We’re pleased to announce that Rategenie is now integrated with Booking Automation!
Who is Booking Automation?
Booking Automation is a professional level property management software to automate your short-term rental operations. Booking Automation’s platform has real-time synchronisation capabilities with all major channels including Airbnb, Booking.com, Expedia, TripAdvisor, and HomeAway.
What does Booking Automation offer?
With Booking Automation, you can automate your calendar, communication, prices, and payment collection. You are also able to have your own direct booking website and integrate with other tools as well. Booking automation is best for Short Term Rental Property Managers, Vacation Rental Operators, Airbnb professional Hosts, Hotels, B&Bs, Holiday Homes, Hostels, Agencies and Automation Lovers.
Rategenie is now integrated with Booking Automation and is able to generate rates for this PMS. Booking Automation users can use these rates for their bookings and rentals by connecting with Rategenie and syncing rates.
How does it work?
The features available are:
Channel Management
Rategenie Integration
Built-in Accounting
Commission Management
Guest Experience Management
Owner Statements
Rate Management
Payment Processing
MarketingAutomation
Housekeeping Management
How do I add this integration?
To take advantage of this integration, you will need to have a Booking automation account. You can then connect it via the Rategenie integration page by following the steps mentioned in the guide here.
We are excited to introduce our integration with Lodgify, allowing you to sync your Rategenie rates to this PMS!
Who is Lodgify?
Lodgify is a vacation rental software with an all-in-one solution that allows owners and property managers to easily create their own vacation rental website and accept online bookings. Owners can manage all reservations from one place and synchronize property data with their booking channels.
What does Lodgify offer?
Lodgify offers scalable subscription plans based on a monthly fee, for both vacation rental owners and managers with 1 to 500+ properties. No set-up fees and no commissions. Automatically sync calendars, rates and reservations across sites like Booking.com, Airbnb, HomeAway/Vrbo, Expedia and more.
How does it work?
The features available are:
Integration With Rategenie
Multi calendar
Channel Management
Automated payment scheduling
Instant synchronisation your bookings
Automated Guest communication
Centralised booking management
24/7 guest messaging
Keep homeowners up-to-date
Dedicated connectivity team
How do I add this integration?
To take advantage of this integration, you will need to have a Lodgify account. You can then connect it via the Rategenie integration page by following the steps mentioned in the guide here.
We are pleased to announce that Rategenie can now sync rates to Beds24!
Who is Beds24?
Beds24 is a cloud-based property management solution that offers a channel manager and booking engine for businesses in the vacation rental industry, such as hotels, holiday homes, B&Bs, hostels, property managers, and agencies.
What does Beds24 offer?
Beds24 is one of the most cost-effective, powerful, reliable and flexible all-in-one-solution which simplifies workflows and automates tasks: *Smart automation tools to manage bookings, prices, availability, guests *Channel manager keeps inventory and prices automatically up to date across all channels *Booking engine with fully customizable widgets and live availability and prices *Secure guest payment collection. Rategenie is now integrated with Beds24 and is able to generate rates for this PMS. Beds24 users can use these rates for their bookings and rentals by connecting with Rategenie and syncing rates.
How does it work?
The features available are:
Channel Management
Rategenie Integration
Multi-Language and Multi-Currency Booking Page
Customisable Widgets and Availability Calendar for Websites, Blogs, Facebook App
WordPress Plugin
Option to sell Tours, Events and Extras
Collection of Deposit or Credit Card Details
Built-in Accounting
Guest Communications
Housekeeping Management
How do I add this integration?
To take advantage of this integration, you will need to have a Beds24 account. You can then connect it via the Rategenie integration page by following the steps mentioned in the guide here.
We are thrilled to announce that Rategenie can now sync rates to OwnerRez!
Who is OwnerRez?
OwnerRez is internationally recognized as a leader in the vacation rental industry for channel management, CRM, PM, accounting, messaging and websites. Integrate with channels like Vrbo, AirBnb, and Booking.com to seamlessly sync availability, rates, rules and listing content. Get your own modern, fast website, process payments directly, manage inquiries, communication and guest checkout with e-sign renter agreements.
What does OwnerRez offer?
OwnerRez’s secure online vacation rental software lets you work from anywhere, share with your team and know that your properties, bookings and CRM records are in good hands. What good are fancy features if they’re built on a shaky foundation? OwnerRez is the solid foundation that all power users and vacation rental experts start with. Rategenie is now integrated with OwnerRez and is able to generate rates for this PMS. OwnerRez users can use these rates for their bookings and rentals by connecting with Rategenie and syncing rates.
How does it work?
The features available are:
Channel Management
Rategenie Integration
Messaging with guests
Website builder
Payment Processing
Reporting
Renter Agreements
Accounting
How do I add this integration?
To take advantage of this integration, you will need to have a OwnerRez account. You can then connect it via the Rategenie integration page by following the steps mentioned in the guide here.
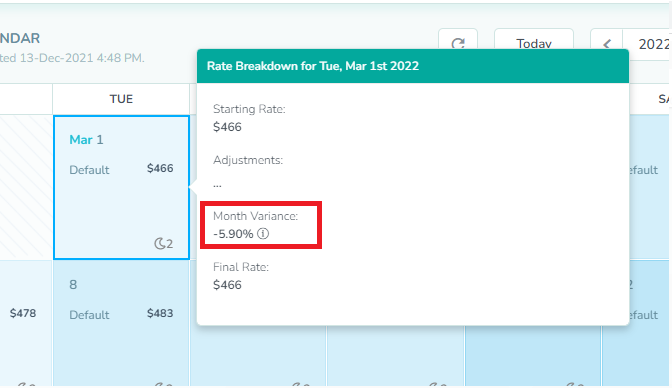
We are excited to introduce the Rate Variance and new color scheme for your rental rates. Now you can quickly judge how much your rates are changing each day for each month by looking at your rates calendar
Month Variance shows a percentage value of how the daily rate compares to the monthly average. The formula used to calculate monthly variance is as follows:
So let’s take an example to understand how variance is calculated for the month of March in London’s locality. These are the rates for March when the base rate is set as 500. The average rate for the month of March is 495.5.
Now let’s take couple of dates for March to see how variance is calculated:
On 1st of March the final rate is $466. If we use that in formula
Variance = ((466/495.5)*100)-100
Variance = -5.95
Similarly if we take the example of 11th March According to formula: On 11th March the final rate is $526. If we use that in the formula.
Variance = ((526/495.5)*100)-100
Variance = 6.20
Note: Front end has all the values after round off. So there is a chance of little difference in values shown and manually calculated.
The color coding is also done based on the variance. You can also see the monthly variance just by looking at the calendar. If the rate for a specific date is higher than the monthly average, we mark it dark blue and if it’s quite lower, the rate tile will be shown in light blue.
We’re pleased to announce that a new and updated, more user-friendly Rategenie design is now available for the web version at app.rategenie.io. With this new user interface, you’ll be able to perform all of your vacation rental management duties and configure dynamic pricing strategies with ease! The new UI has improved navigation, usability and it’s more powerful than before.
What has Changed?
The short answer is “User Experience”. Users are now able to use all the features available in the old design and some new functions more effectively and conveniently. Here is the rundown of changes made in each module:
Sign in / Sign Up
New Design
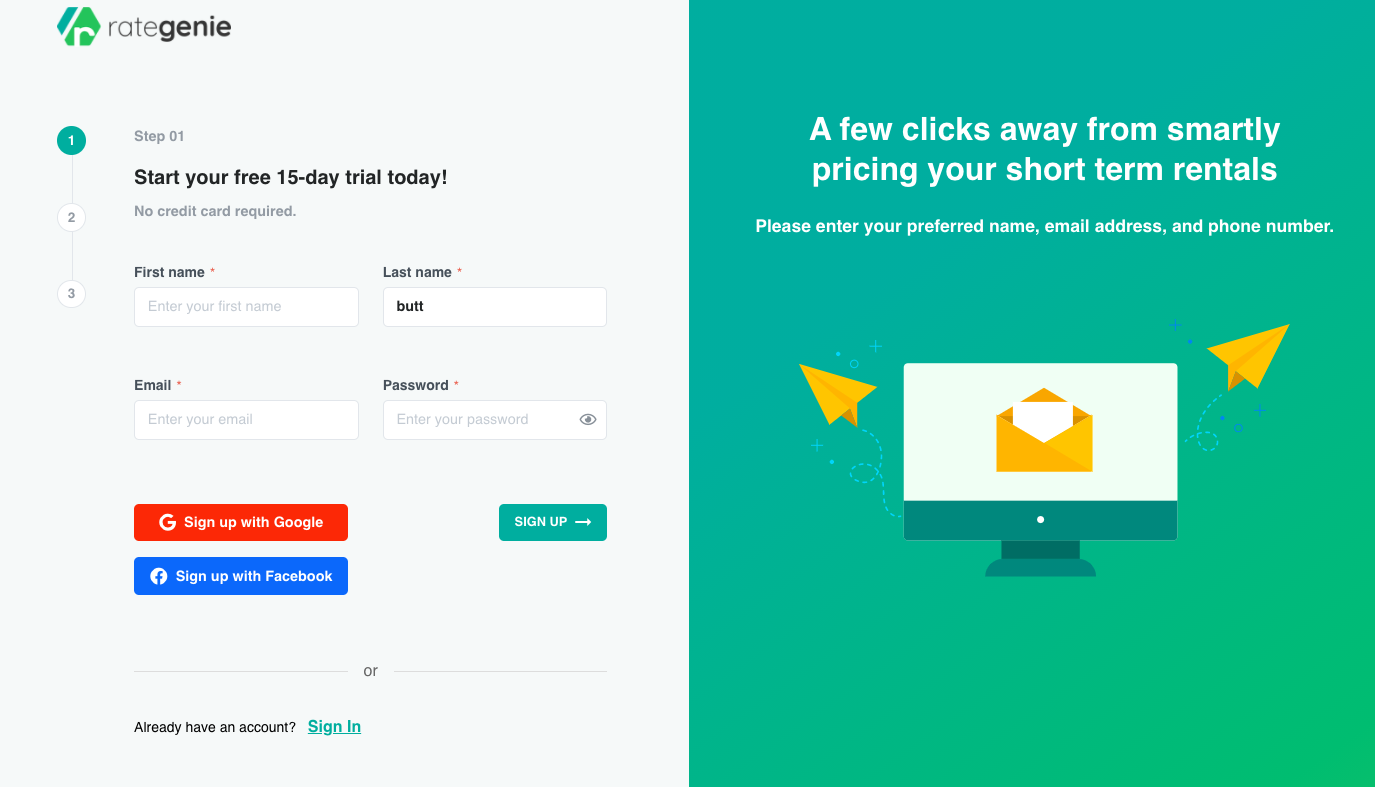
Users now are able to directly sign up from Rategenie without using a channel manager
Rategenie new Signup page
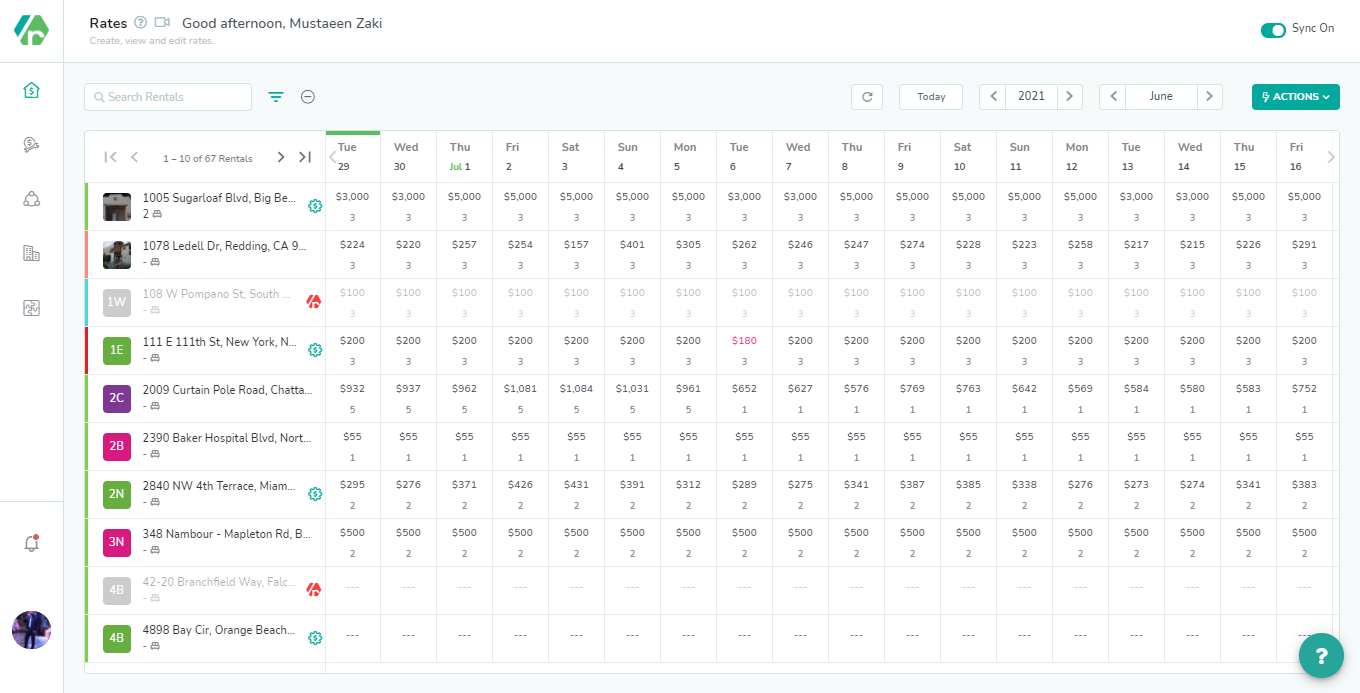
Rates
Repositioning of Menu Items
Cooler Calendar look
Better Icons
Finer Placement of Buttons
Max Stay field added in Rental Rate Settings
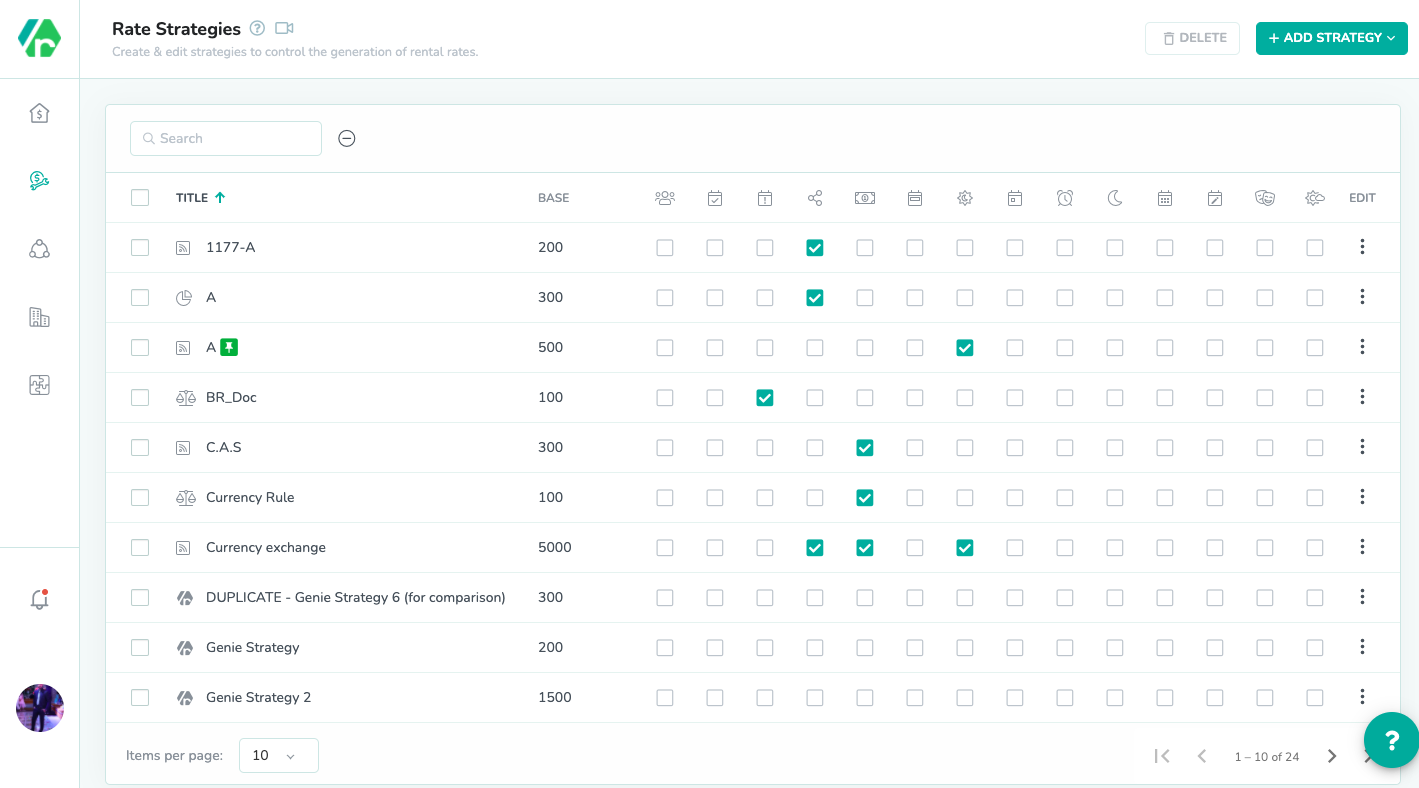
Strategies
Fresh Look.
Auto-Adjust columns of changed zoom levels.
Rentals
New Look and Feel
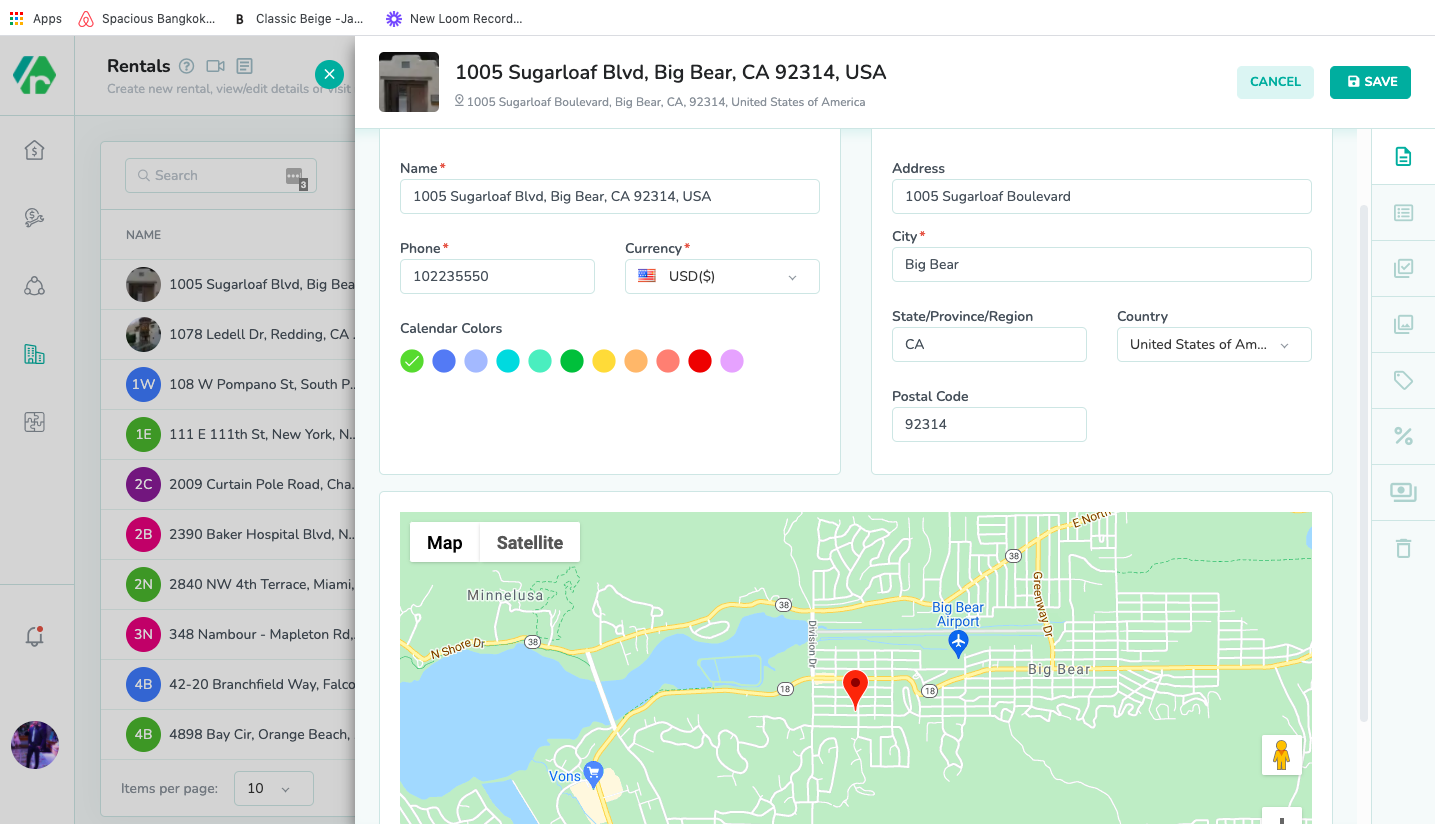
Ability to create Rentals within Rategenie
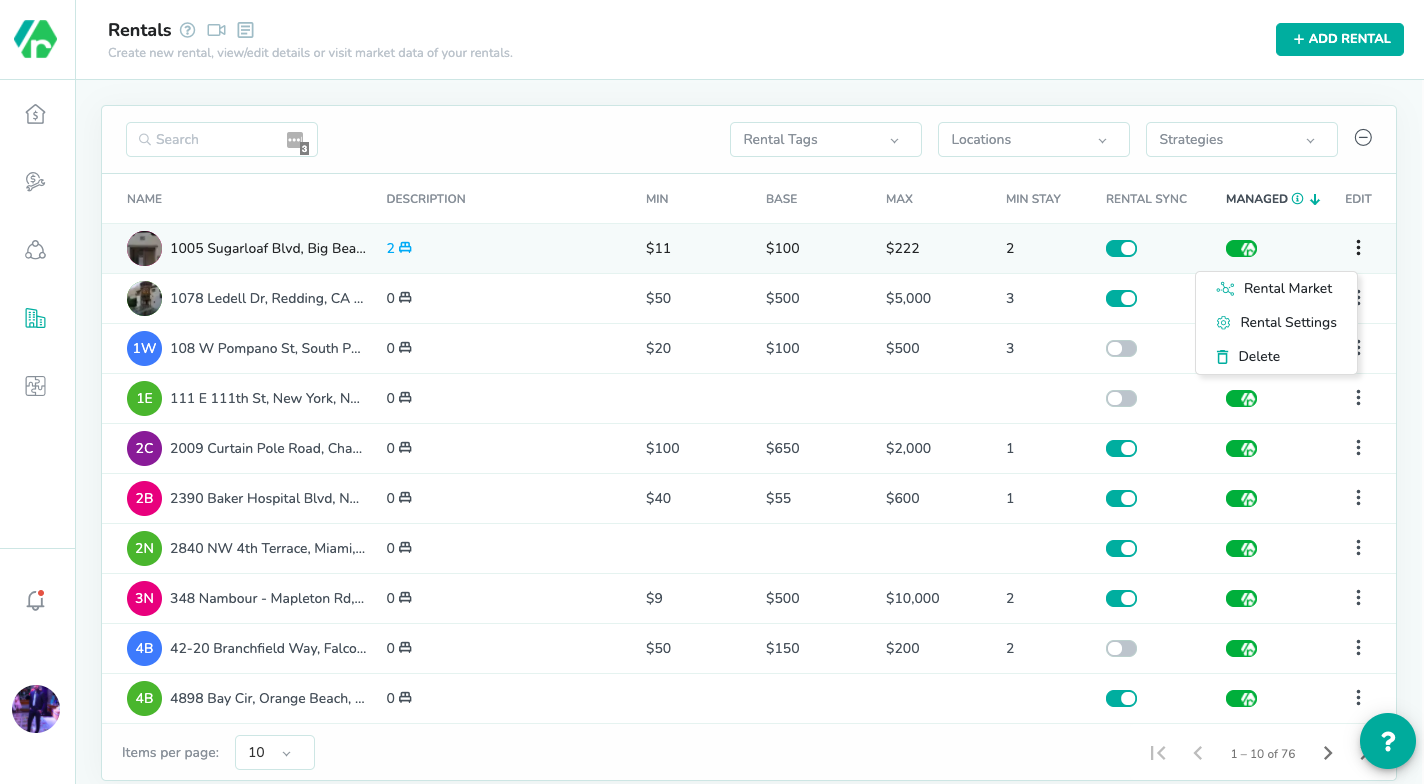
Update/Delete Rentals directly from Rategenie
Authorize or Unauthorize Rategenie to generate rates for specific Rental by Rategenie managed toggle
Max sleep can also be managed now from the Rategenie rental detail view tab
Updated Design for Rental Metrics, Market data graphs, and Event/Weather information.
Listings
Changed and Better Appearance
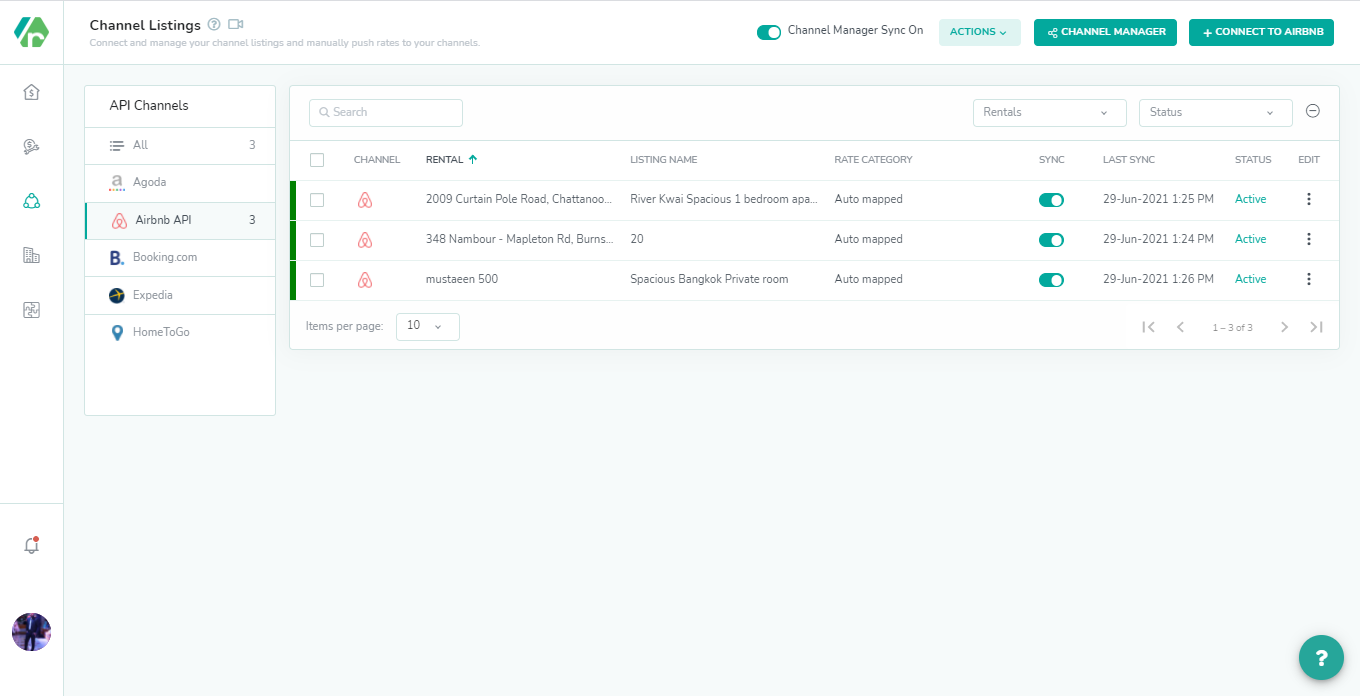
Natively add Airbnb listings directly from Rategenie
Open your connected Channel Manager through the Listing page
Manually Push Rates and see Connection/Channel Details
Integrations
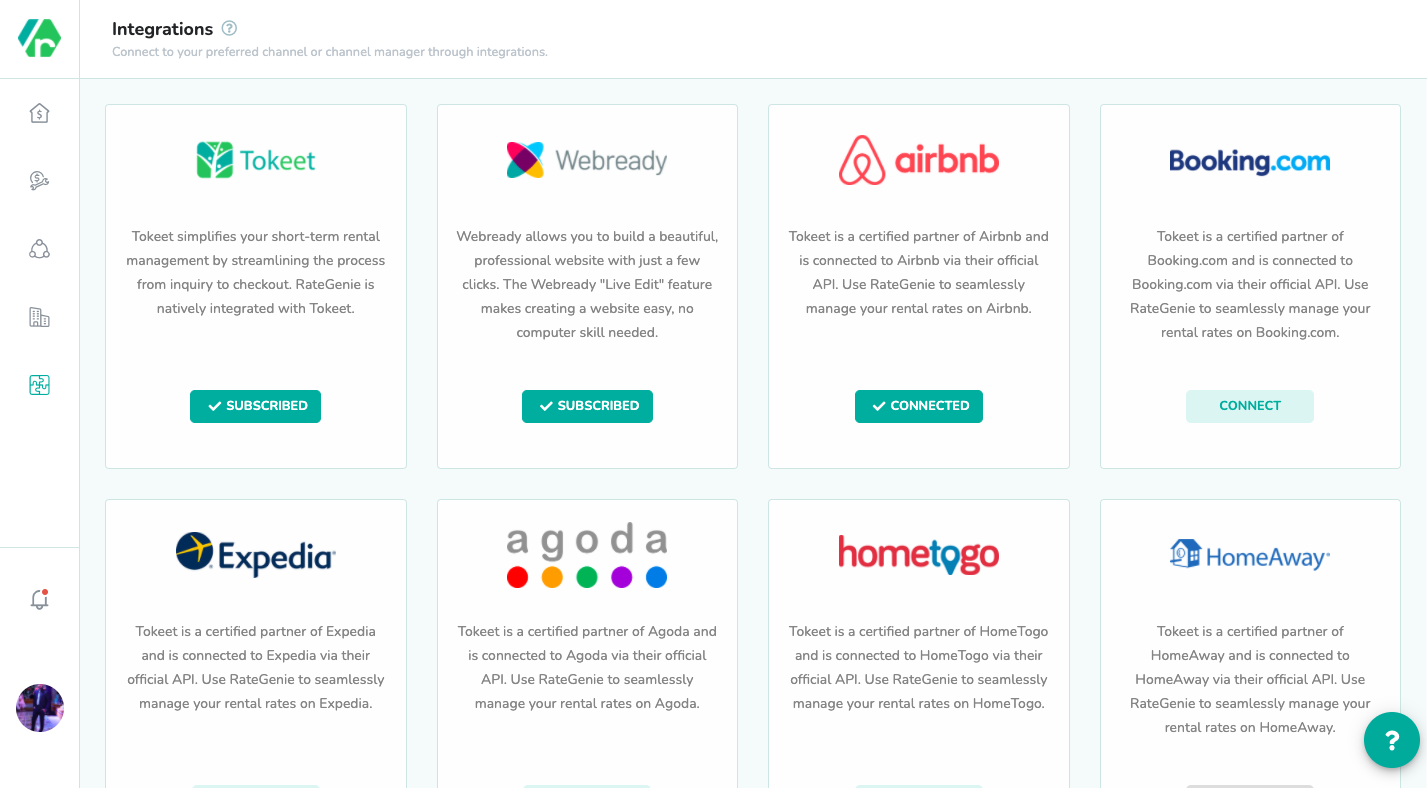
Connect to Channel Manager and different Channels from Integration page
User Settings
Add new users directly from Rategenie
Updated Billing Info
Calculate Pricing Feature
View Changelog
Rategenie has set the bar for dynamic pricing tools in VR management, with users regularly experiencing a 30% increase in revenue. With this fresh look, Rategenie wants to provide users with ease of doing business and further increasing their revenue with fewer complexities.
How can I shift to the new Rategenie UI? Please note that you will be automatically shifted to the New UI, but you can still navigate back to the old UI of Rategenie through your ‘Settings’ page.
Current Tokeet users can login to our new Rategenie UI using their Tokeet credentials. You may also auto-login from within TV3 or Sympl CM by clicking the Add-Ons top menu option, then selecting Rategenie. Rategenie is also available as an add-on product on our Tokeet App Store. Anyone can use Rategenie with or without a TV3 subscription. Rategenie is built so that anyone using any channel manager can still use it. It can be used as a standalone product that manages rates or along with TV3 or Sympl CM. Other PMS can also be added to Rategenie in near future.
How much does the new Rategenie UI cost?
All new Rategenie customers will be assigned the new Rategenie plans. Existing customers will remain on their current plans and we will transition them over in time. Please click here to learn more about Rategenie Pricing.
If you have any questions please contact our support team at support@tokeet.com
Rategenie’s LOS (Length of Stay) Discount allows you to provide a discount to guests who are staying over a specified period of time at your rental. This will add more appeal for long-term bookings. Setting up LOS Discounts is a breeze and we’ll give you a look at the way it works once they have been set up.
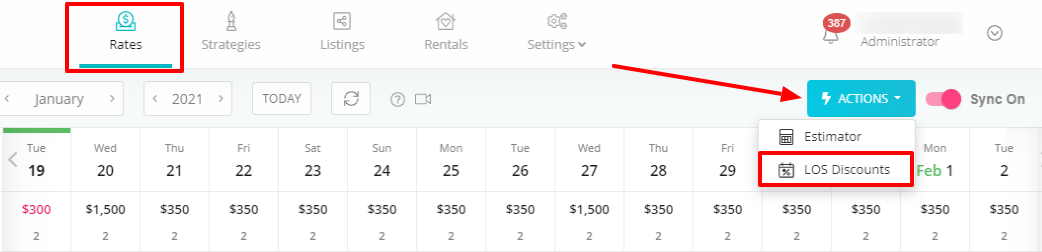
LOS Discounts can be added from the Rategenie’s Rates page.
Here, you will set the required fields, such as type of discount, length of stay, discount amount, and the minimum number of guests.
Length of Stay defines the number of days for which guests have to stay to get the discount. The discount will also only be applied for bookings with a guest count equal to or more than the number of guests specified in the ‘Guests’ field of the LOS Discount.
Can I apply LOS for a specific Rental or Channel?
While creating your LOS discount, you’ll have the option to select specific Rentals and Channels. You may select one or more Rentals/Channels from these fields. If nothing is selected, then the Discount will be applied to all Rentals/Channels.
If there are multiple LOS Discounts, which one would be applied?
You may have various LOS Discounts that may be applicable to a booking, to understand which one will be applied, we have come up with the following cases that your booking may fall under.
Cases:
Same settings except for different amounts– the discount which has a greater amount set will be applied. For example, if we have LOS1 with an amount set as 50, and LOS2 with 100, LOS2 will be applied for each booking if all other settings are the same. The case will be similar if one LOS has the type set as a percent and the other as Flat, the LOS where a greater discount is offered will be applied.
e.g. LOS1 has type ‘Percent’ and amount 50 while LOS2 has type ‘Flat’ and amount 100. In this scenario, if the booking amount is less than 200 LOS2 will be applied since 50% of that amount will be less than 100; whereas, LOS1 will apply if the booking amount exceeds 200.
Different Length values –The discount with a greater Length set will be applied for a booking that satisfies the conditions set in both LOS discounts e.g. Let’s suppose we have two LOS discounts, one weekly, with the length set as 7 and the other is a monthly discount with the length set as 30.
In this case, if the booking is for any number of days between 7 & 29, the first LOS discount will be applied and for bookings with 30 or more days, the second LOS will be applied.
Different Guests’ values – If your booking meets the criteria set in both LOS discounts, the one with the greater discount amount will be applied. Let’s take two examples to understand this.
Example 1:
Let’s say we have two LOS discounts with the following settings:
In this case, LOS2 (discount of 100) will be applied if the number of guests is 2 or 3. For 4 or more guests, LOS1 (discount of 200) will be applied.
Same settings except for different date ranges – The preference will be given to discount with a greater amount set. Let’s take a look at a couple of examples:
Example 1:
Let’s say we have two LOS records with the following settings:
LOS1- Type: Flat, Amount: 200, Length: 2, Guests: 2, Start Date: March 1, 2020, End Date: March 31, 2020
LOS2- Type: Flat, Amount: 100, Length: 2, Guests: 2, Start & End Date not specified
In this case, a discount of 200 will be applied for bookings in March and LOS2 will be applied for all other months
Example 2:
LOS1- Type: Flat, Amount: 200, Length: 2, Guests: 2, Start & End Date not specified
LOS2: Type: Flat, Amount: 100, Length: 2, Guests: 2, Start Date: March 1, 2020, End Date: March 31, 2020
In this case, LOS1 (discount of 200) will be applied for all bookings.
All rentals selected manually in one LOS discount and the other with account-level settings (no rental is selected) – The LOS discount where all Rentals are specified will be applied to bookings.
All Channels are selected manually in one LOS discount and the other with account-level settings (no Channel is selected) – The LOS discount where all Channels are specified will be applied to bookings.
The priority for Channels and Rentals works in the following manner.
Priority is defined as:
Rentals + Channels || Rentals || Channels || No Channels or Rentals
Priority with Channel in Inquiry: R+CH || R || CH || ACC
Priority with No Channel in Inquiry: R || ACC
Note:
R= rental
CH= Channel ( like Tokeet/Sympl, web-ready, etc)
Acc= Account
—————————-
Please note that currently, LOS discounts are available only for channels like Tokeet/Sympl and for Webready.
If you have a rental/rentals in Rategenie and you are looking to set your own sets of rates for each day, then the Custom Feed Strategy is perfect for you. Here’s a brief overview of how Custom Feed Strategy can work for you.
Let’s say that you are a property manager and you already have in mind what you think your rates should be for each day of the week for the foreseeable future. The Custom Feed strategy allows you to upload all of your own ready-made rates that are organized by CSV file directly into your Rategenie rates calendar. On the other hand, if you are constantly updating your CSV files through your own public feed URL, you can add that URL to this strategy and all information from your URL will be automatically pulled into the Rategenie rates calendar as well. This way, you will be able to set your own set of rates and use Rategenie to update those rates daily.
1. How can I start using the Custom Feed URL to update my rates?
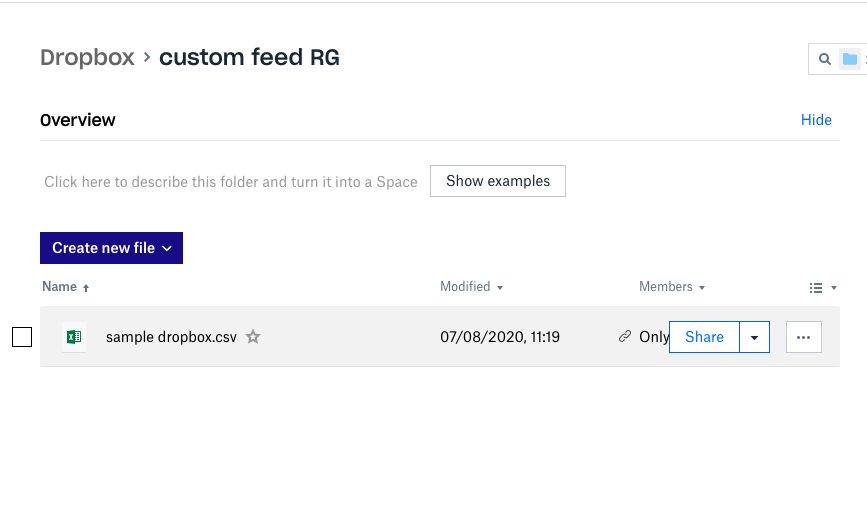
As a property manager, you can make a CSV of your custom rates and upload it on your local server or you can place your file on dropbox and can create a Public URL of that file in order to use that feed file URL in Rategenie. Rategenie then uses that feed file URL to pull your rates information at least once per day to fetch the latest changes of your feed rates.
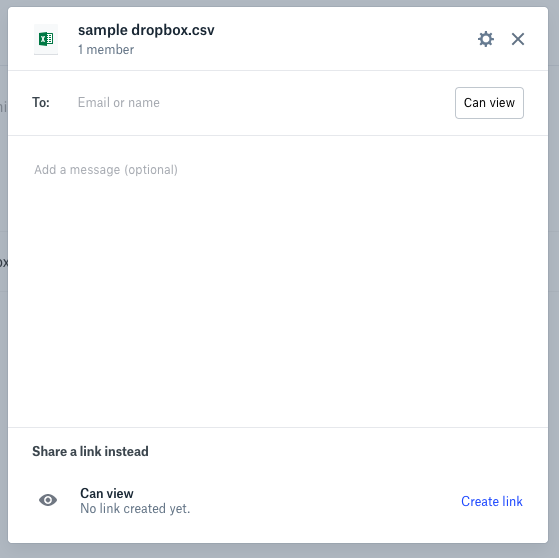
First, upload your CSV in your dropbox file list. Then click on the ‘Share’ button next to your uploaded CSV.
Then click on the create link button, a public URL will be created for your CSV file.
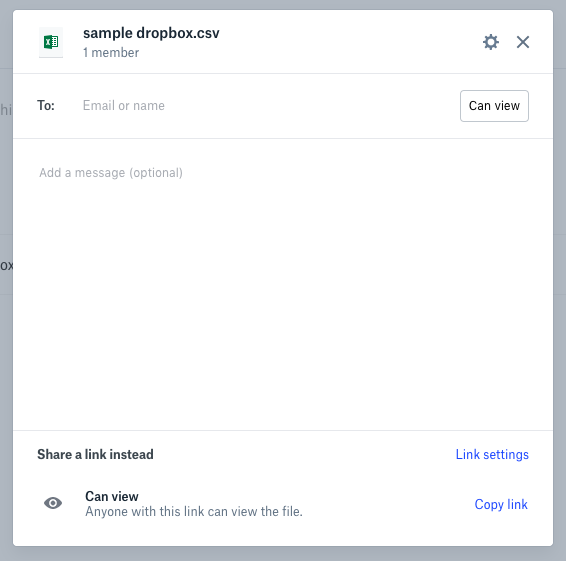
Once the link is created, you will see a copy link option for your file. Click on the copy link button. Make sure this link is public and then that link can be used in Rategenie in the Feed URL option.
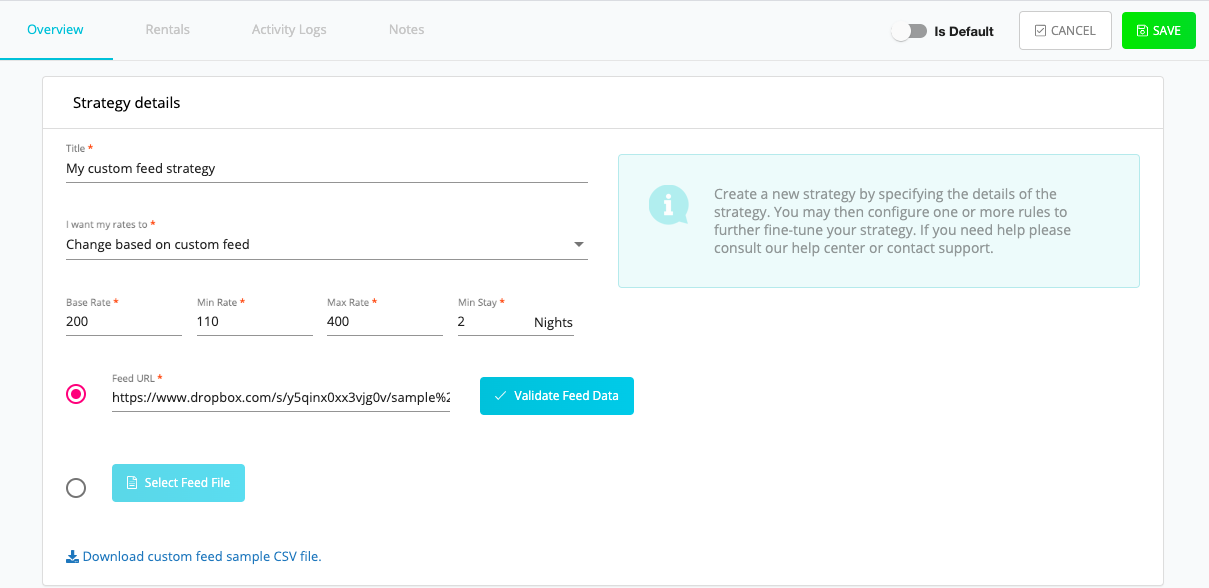
Copy and paste your URL in the Feed URL option and click on the ‘Validate Feed Data’ button to make sure your feed file URL data is valid. Finally, click on the ‘Save’ button to save your strategy.
2. How can I manually upload my custom CSV from my computer?
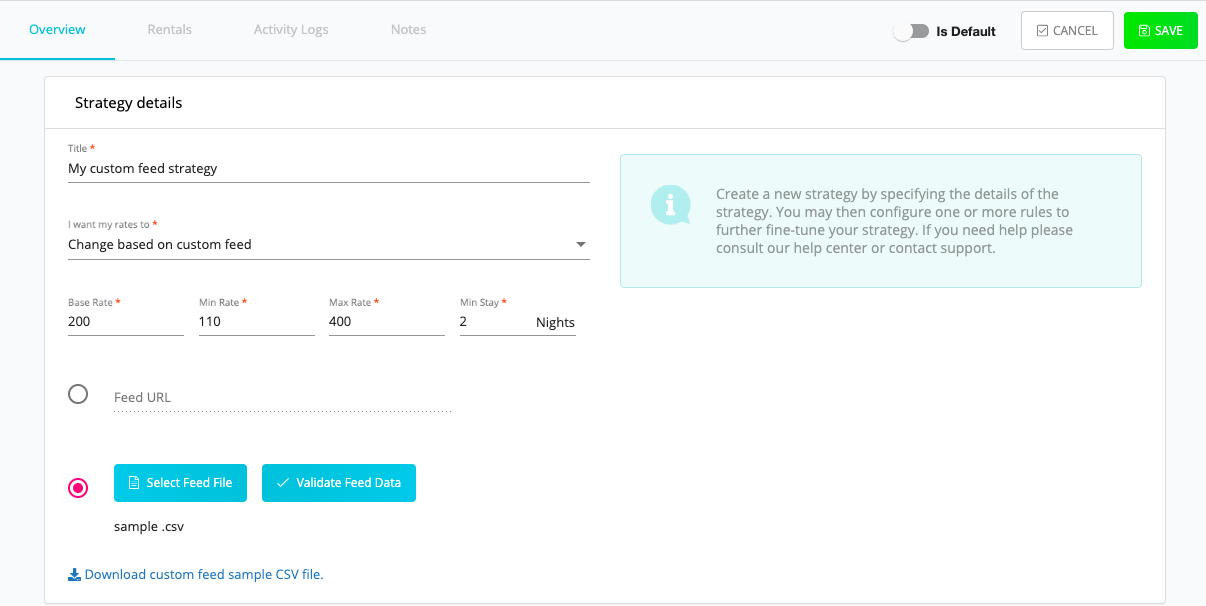
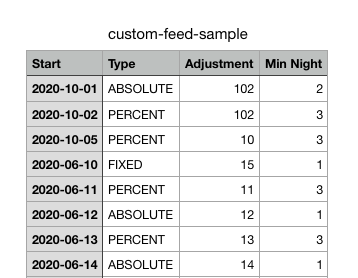
If you don’t feel comfortable uploading your feed file on your local server or on your dropbox then you can also upload your custom rates CSV from your computer. To see the data and formats that should be used in the CSV, you can view our attached sample CSV.
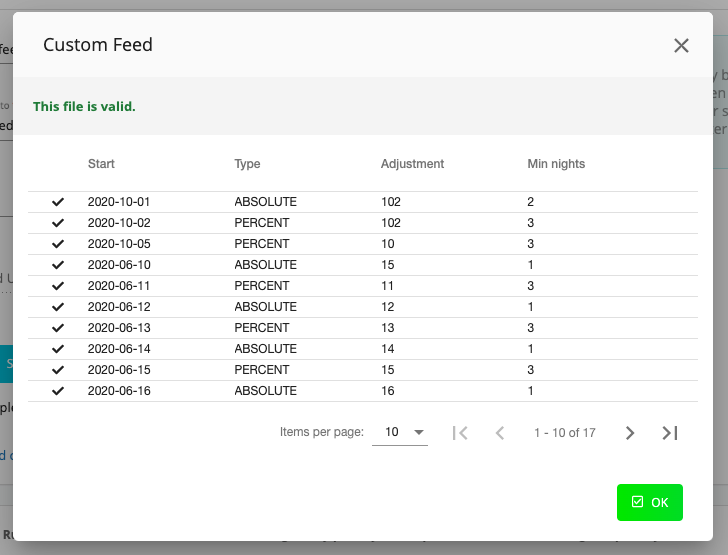
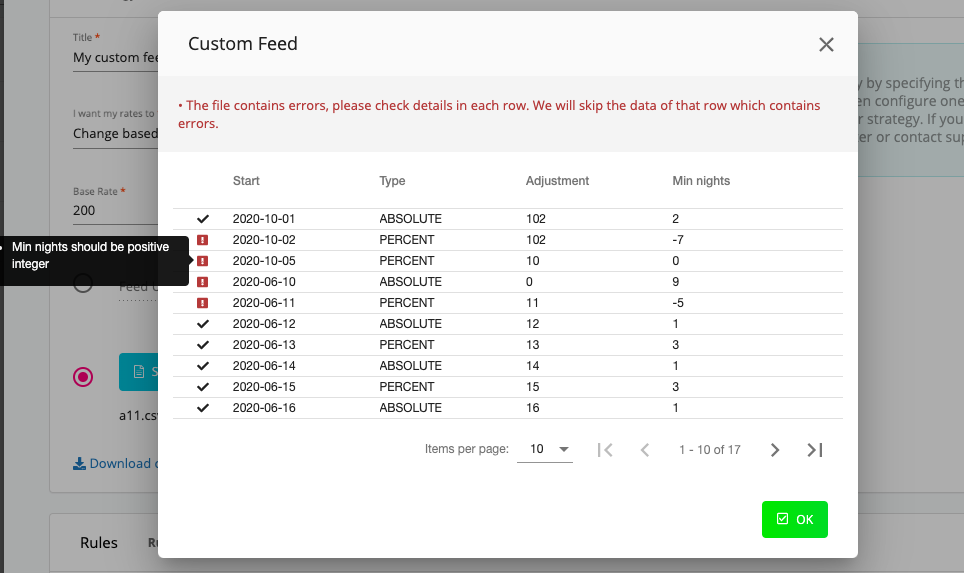
In both options ( Custom feed URL or Manually uploading a CSV) If there is no error in your feed file, then you will get a “File is valid” message, if there is an error in any row then we will simply skip the data for that row only. You can also make corrections to your file and upload your feed data again.
Note: All of the adjustments that you have set will be applied to the base rate settings for your defined rental/strategy level settings, the exception is if you are using Seasonal Rule, in that case, the adjustment will get applied to the Seasonal rule base rate settings for that period. Also, the min nights that you have set in your feed file will have a high priority. Please note that min nights in your feed file are optional, if they are not set, then Rategenie will pick up min nights according to your strategy rules’ min nights priority.
Rategenie’s Alternate Bedroom Count option allows you to change your rental’s bedroom count to generate rates that are comparable to your competitors.
Let’s say that your rental’s original bedroom count is set to 1 and the competing listings in your area are mainly 2 bedrooms with prices that reflect this.
To tweak your rates to be on par with those competitors, you can adjust your rental’s bedroom count.
This can be done without interfering with your Tokeet rental data which is used for your websites, booking engines, guest portals, and rental invoices.
How can I start using the Alternate Bedroom Count?
Adding an alternate bedroom count is easy.
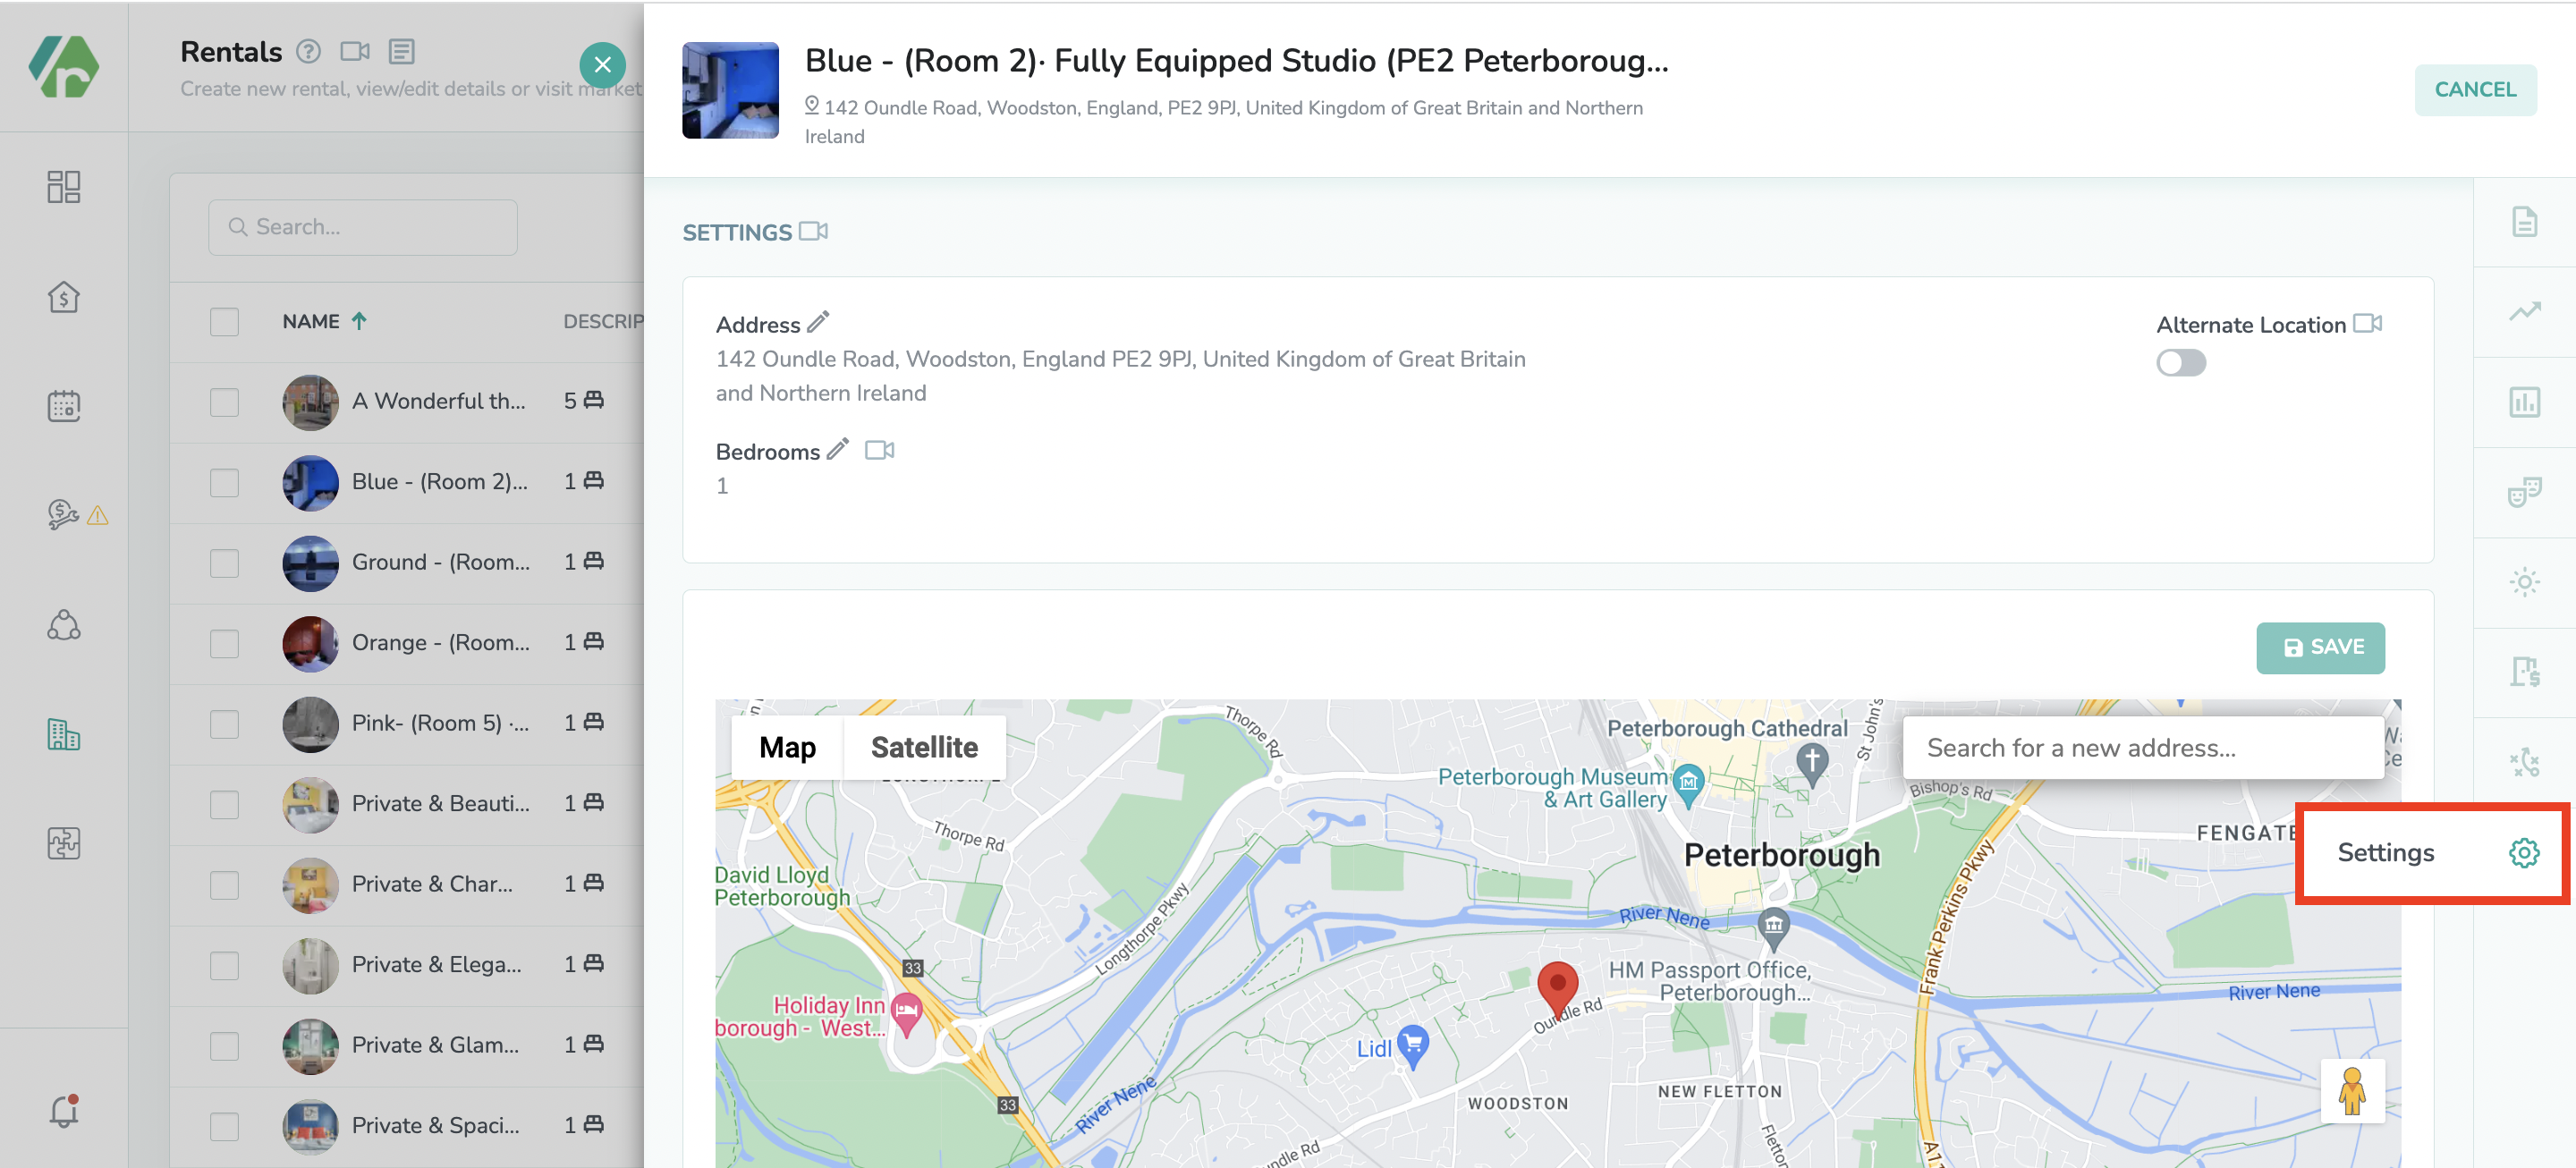
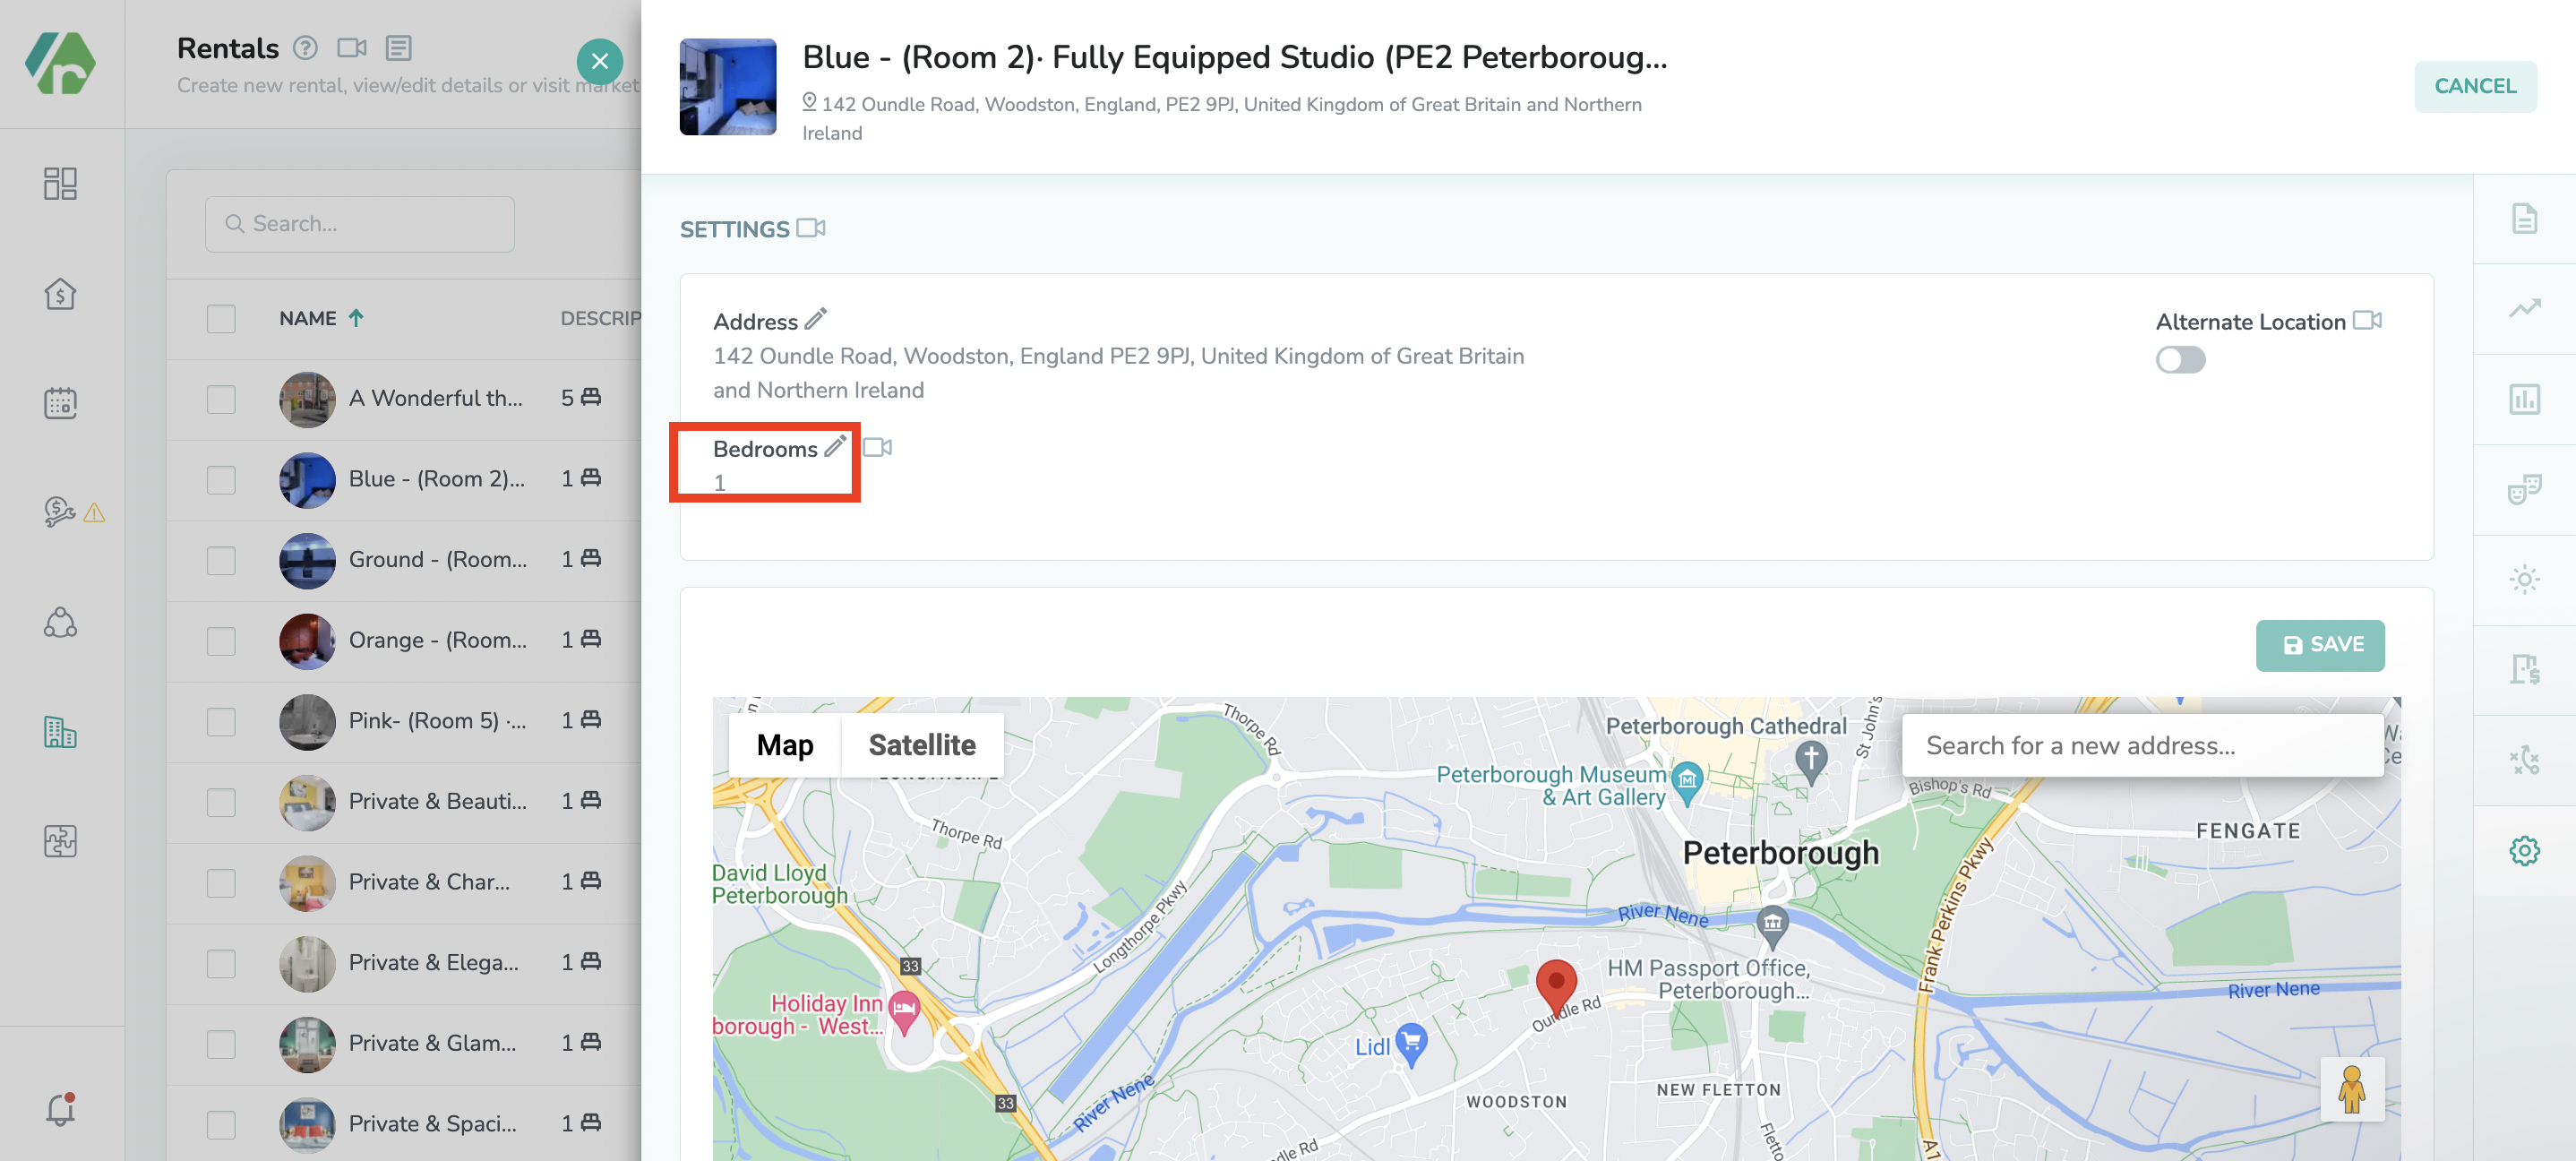
On the rentals module list view click on the rental name to go to the detail page, then go to ‘Settings’ section at bottom right and click on the blue pencil icon next to your bedroom count.
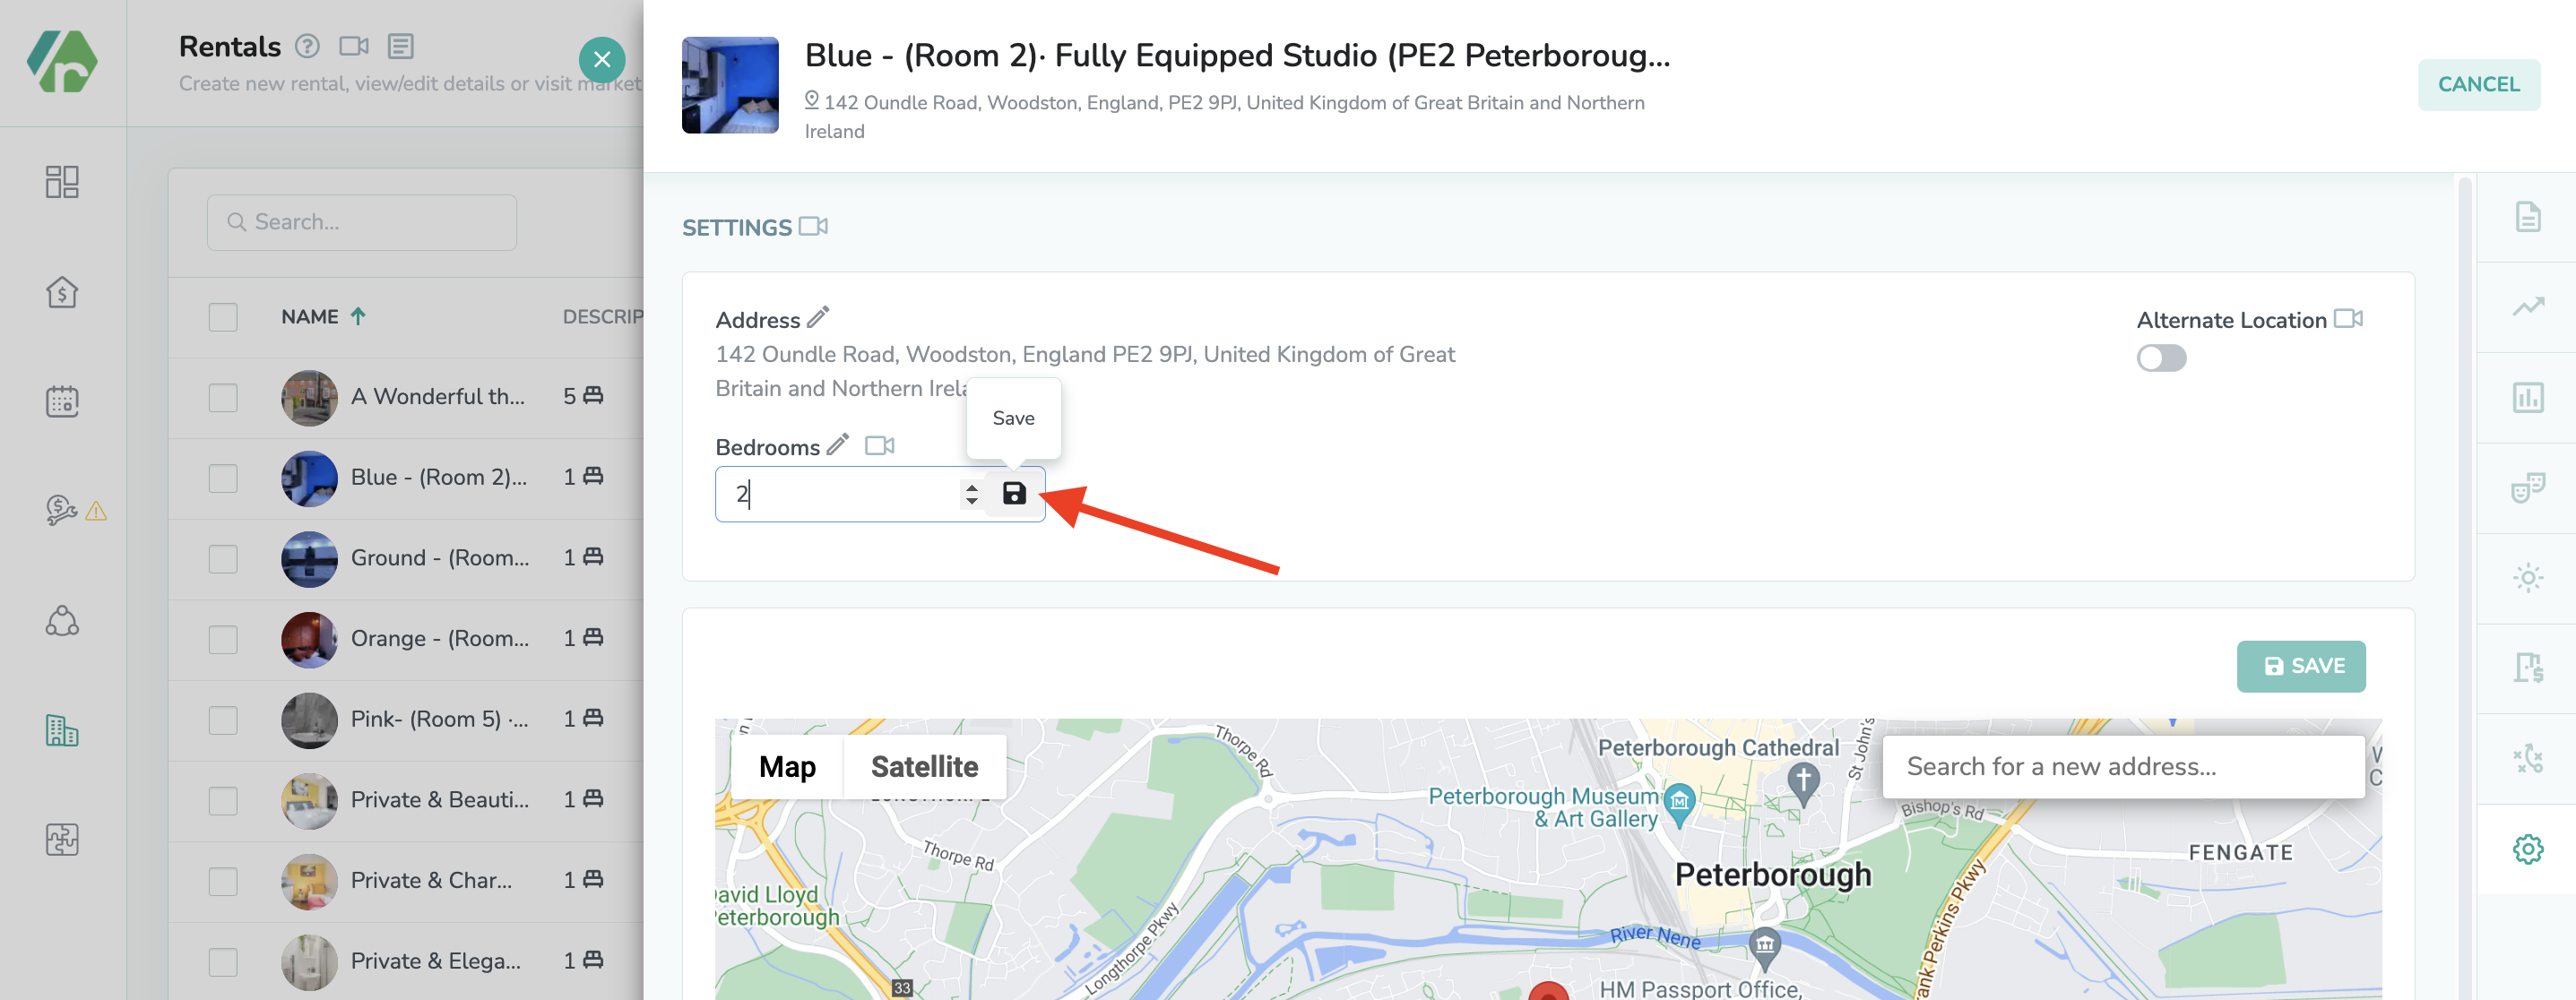
This allows you to enter your new bedroom count then click on the save icon to the right.
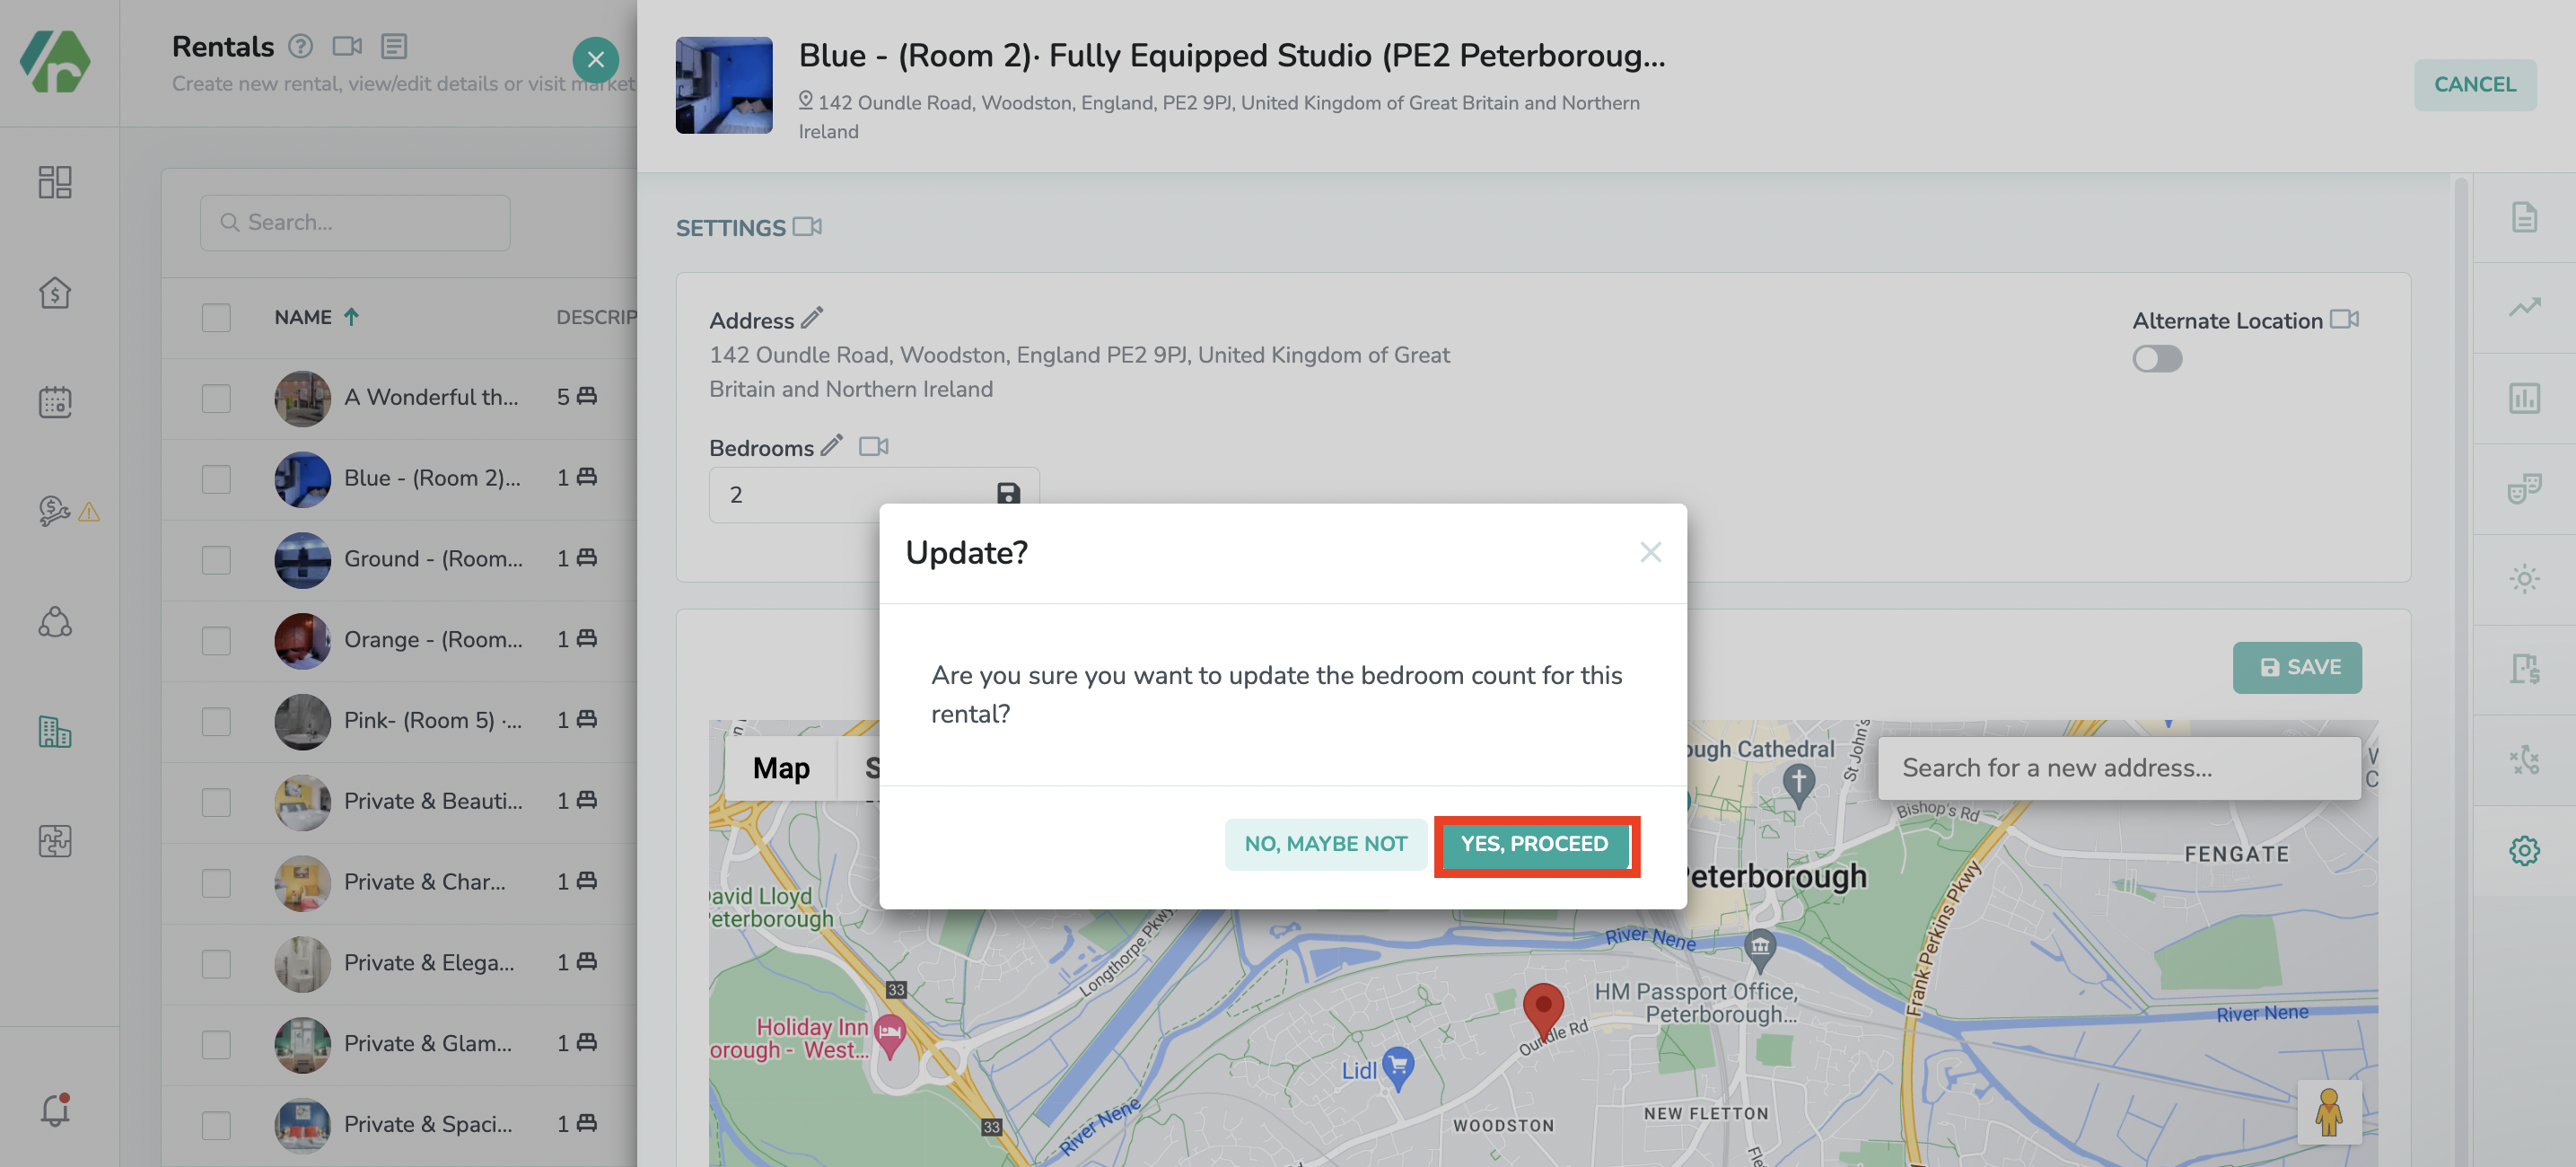
Choose Yes, Proceed.
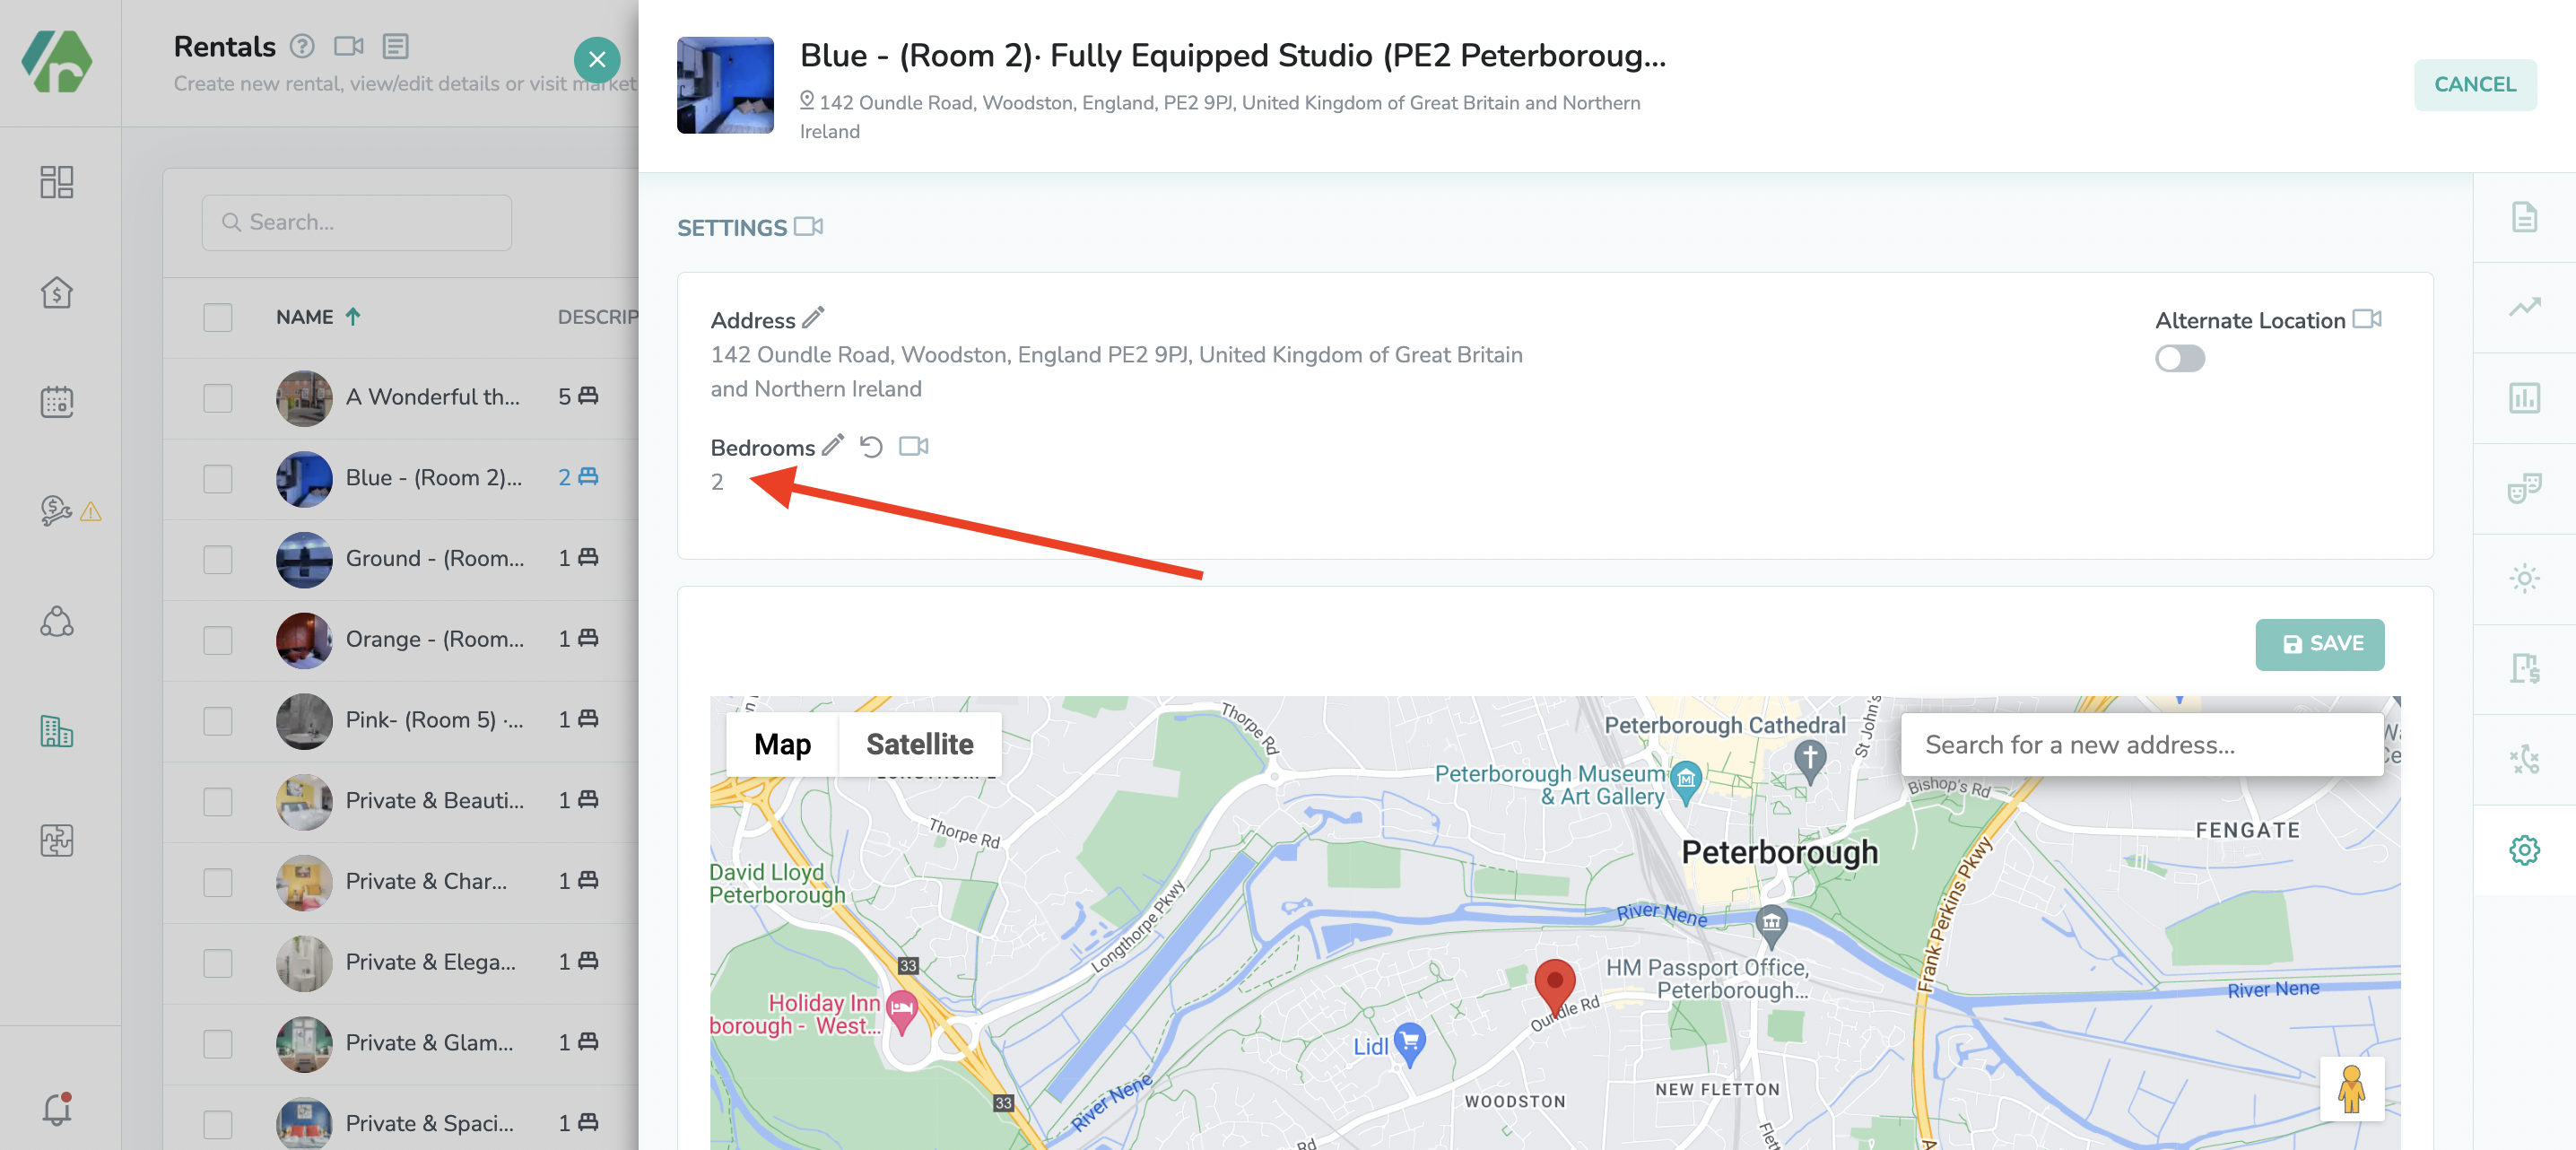
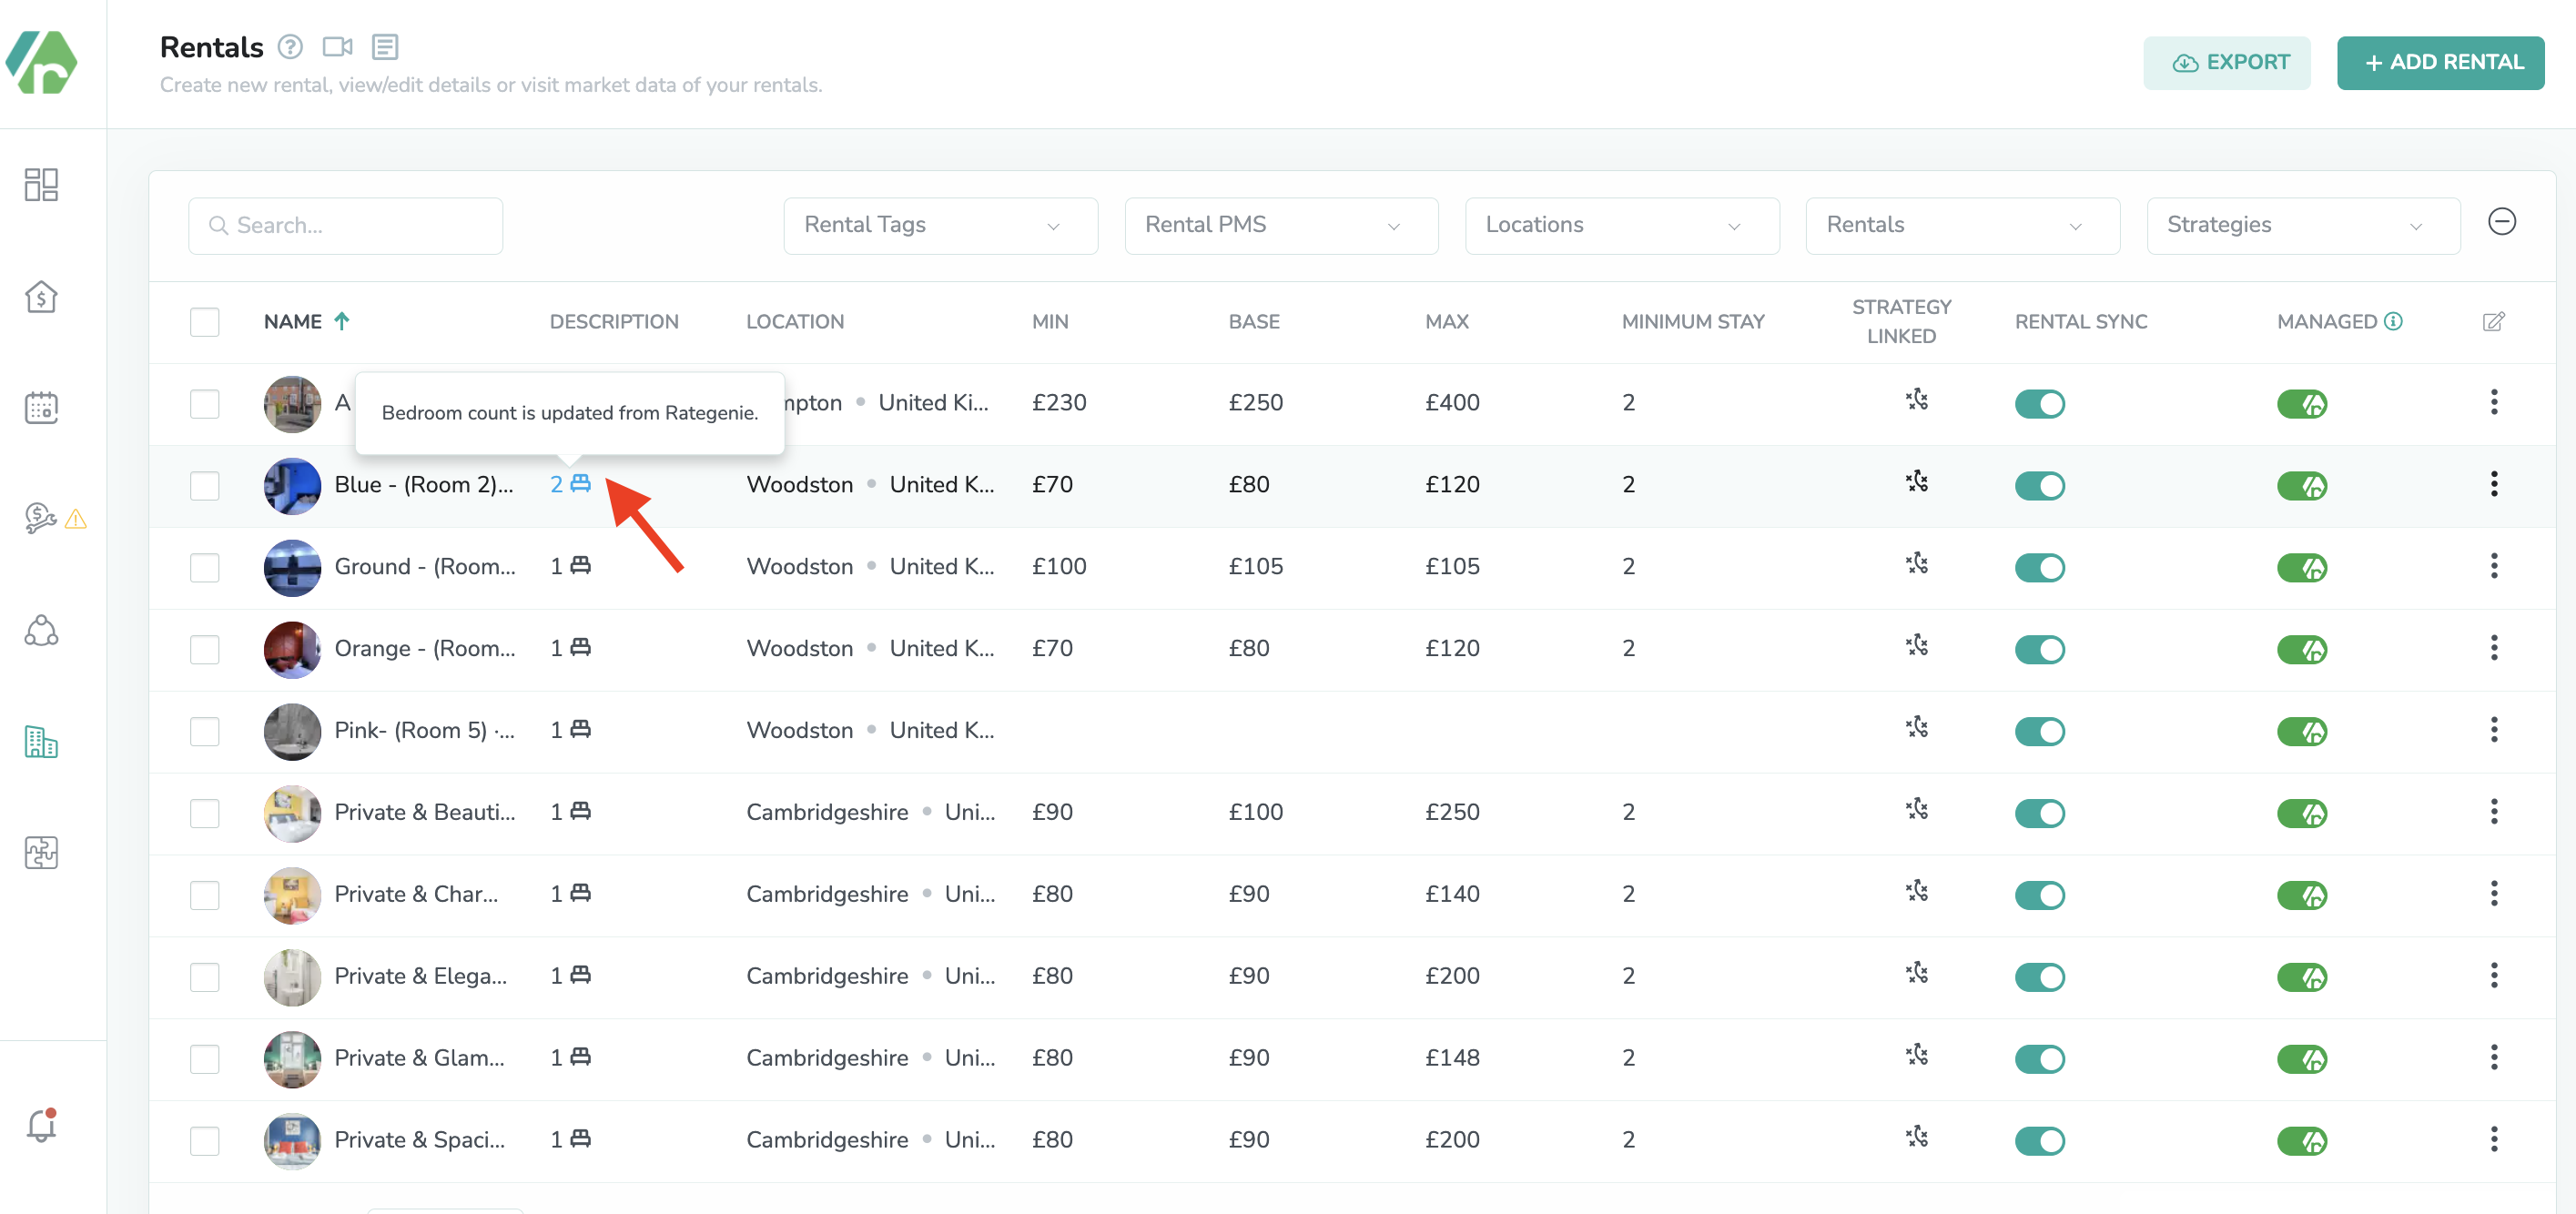
You can see that your bedroom count has now been changed to 2 and you will also be able to see these changes on your RG rental list view.
Rategenie will now use a 2 bedroom count while generating rates for your rental without making any changes to your Channel manager rental data.
Once the new bedroom count is saved, Rategenie will work its magic, and just like that, you’ll have rates to match your competitors.
You’ve created your rate strategies and carefully set each rule to generate the perfect rate for each day in your calendar, but there is no market data available for your rental location.
Keep in mind that the Genie Strategy and Historical Demand strategies use the market data to generate the best prices for your rental. The Alternate Location toggle will allow you to choose an alternate address that can be used to get market data, to assist your Genie/Historical strategy to generate rates, without interfering with your current primary address location, which will still be used for your weather forecast, rental invoices, guest portals, and events data.
How can I use the Alternate Location toggle?
For the example below, let’s say that your rental is in a remote area of Canada that does not provide any market data.
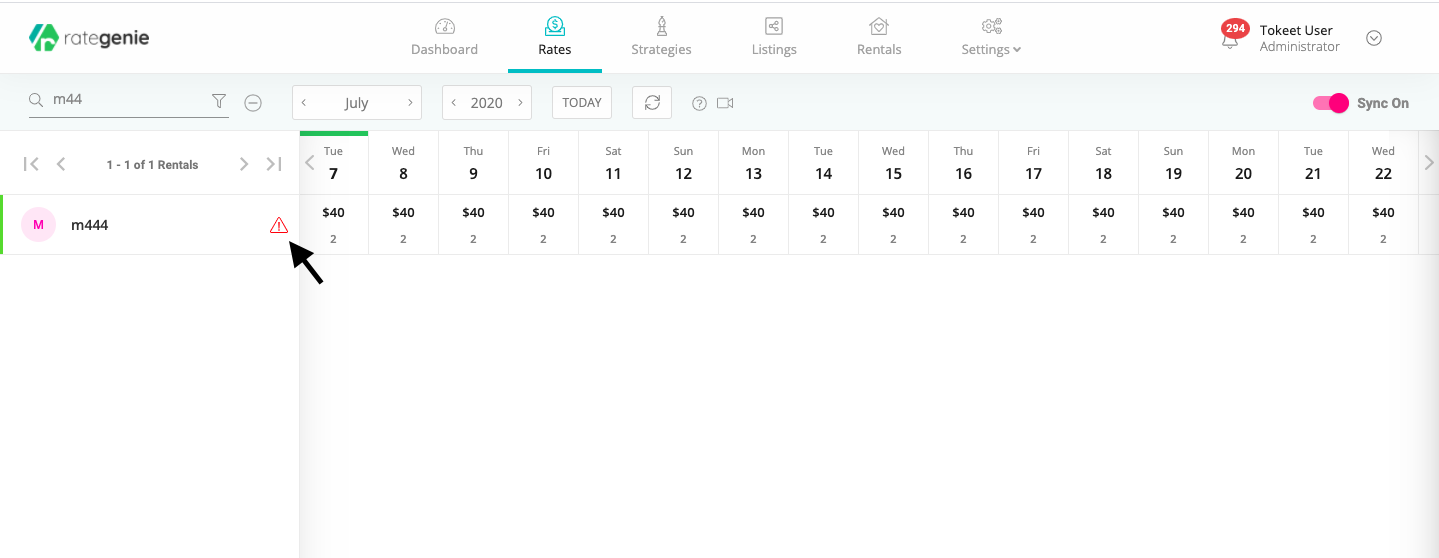
If you look at your rates module in RG and look at your rental, you will see a red alert. Clicking on this alert will let you know that your rental market data is not available, therefore Genie and Historical demand strategy will not be able to generate proper rates for your rental.
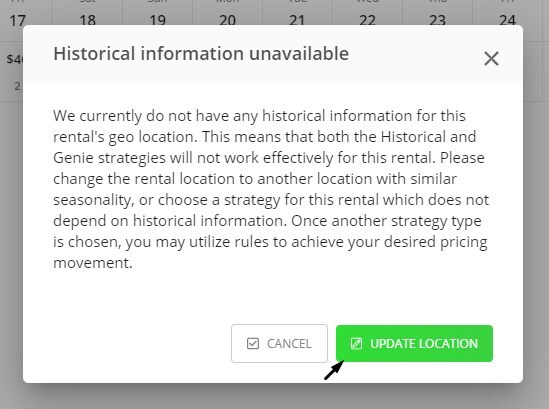
To fix this problem, click on the red alert symbol in your calendar. This will display the Historical information pop up. You will then need to click on the green Update Location button. You will be taken to your rental overlay page, where you will be able to set the alternate location to get the market rates from that location.
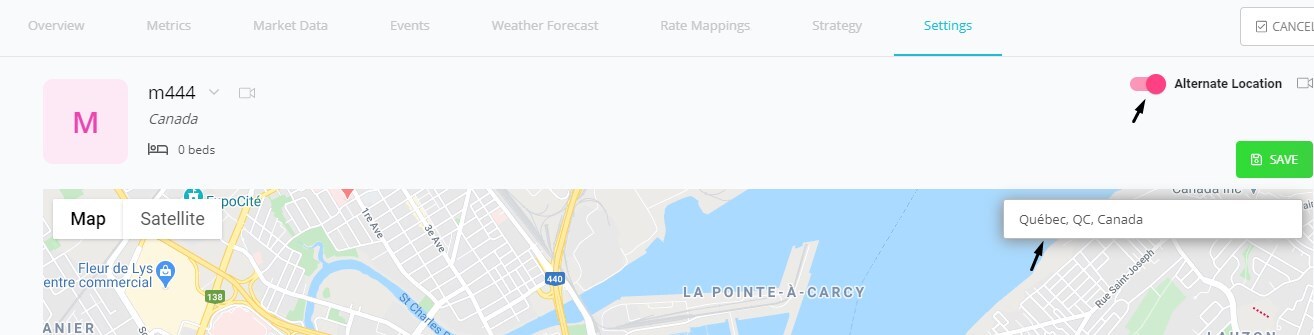
In the below screenshot, the Alternate Location is turned ON, allowing you to set a completely different location in the search bar below.
Doing this will allow you to get the market data for your rental without impacting your current primary location.
Once you choose the alternate location, be sure to click the Save button. This will allow you to generate new rates based on this location.
The Red Alert symbol will no longer show for your rental, letting you know that it now has Market Data available. You will also see that the rates have changed according to the alternate location that you have set in your rental overlay page.
That’s it, having an option to set an alternate location will allow you to get the most out of Rategenie’s Genie Strategy and Historical Demand strategy while optimizing your rates to work for you.